When to Replace E-Bike Brake Pads: A Complete Guide
Your e-bike brake pads work hard every time you ride. They stop a heavier bike and often handle higher speeds than regular bicycles. This means they wear out faster than you might expect.
Many riders ignore their brakes until something feels wrong. By then, stopping power already suffers. Worn pads can turn a quick stop into a dangerous situation.
The good news is that brake pad wear shows clear warning signs. You just need to know what to look for. This article will teach you exactly that.
We will cover the key thickness measurements that signal replacement time. You will learn to spot wear lines and minimum thickness indicators on your pads. We also explain how rotor damage connects to pad health.
You will discover the differences between soft and hard pad compounds. Each type offers unique trade-offs for your riding style. We will also highlight common mistakes riders make with brake maintenance.
By the end, you will feel confident inspecting your own brakes. Regular checks keep you safe and save money on repairs. Let’s get started on keeping your ride smooth and secure.
In a Nutshell
Here’s a quick summary to keep handy:
-
Check pad thickness often. Replace pads once they drop below 1 to 2mm. This is the critical safety threshold.
-
Watch for wear indicators. Most pads have a wear line or marked minimum thickness. If you can’t see this line anymore, it’s time for new pads.
-
Pay attention to stopping power. Reduced braking performance is a clear sign your pads are worn out. Don’t ignore this warning.
-
Inspect your rotors too. Look for deep grooves, blue discoloration, or thickness below the minimum mark. These signs mean your rotor needs attention as well.
-
Choose pads based on your riding style. Softer pads give better modulation but wear faster. Harder pads last longer and work well for descents and high speed stops.
-
Avoid common mistakes. Don’t wait until your brakes fail completely. Regular visual checks make a big difference and help you catch problems early.
Simple inspections now can save you from bigger problems later. Your safety depends on well maintained brakes.
Signs Your E-Bike Brake Pads Need Replacing
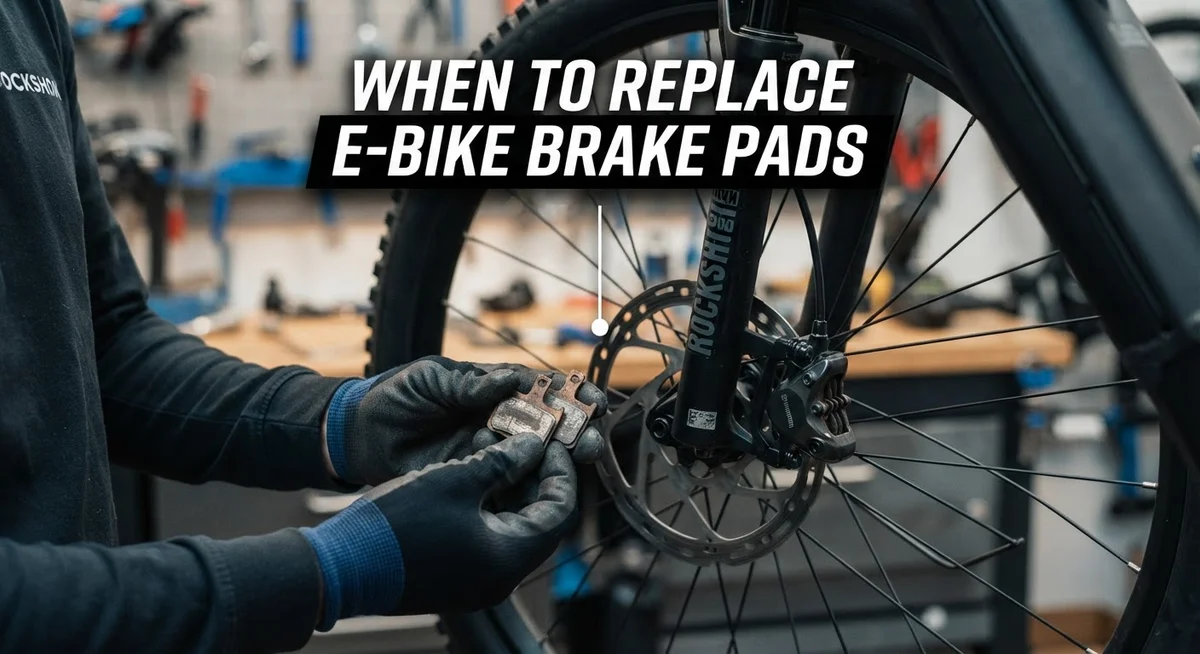
Your e-bike’s brake pads send you clear messages when they need attention. The most important signal is pad thickness. When your pads measure less than 1 to 2 millimeters thick, replacement time has arrived.
Many brake pads include a wear line or minimum thickness indicator built right into them. This visual marker makes checking simple. Look at your pads from the side. If the friction material sits level with the wear line, you need new pads soon.
Reduced stopping power is your next red flag. If your e-bike doesn’t slow down as quickly as it once did, worn pads are likely the cause. This happens gradually, so compare your braking to how it felt months ago. Sluggish stops mean your safety is at risk.
Pay attention to how your brakes feel when you squeeze the lever. Does it feel mushy or require more pressure than usual? These sensations point to pad wear. Your brake system is telling you something needs fixing.
Uneven pad wear also signals replacement time. Inspect both pads on each brake. If one pad looks thinner than the other, replacement is necessary. Uneven wear can indicate alignment issues, but the pads still need changing.
Listen for unusual sounds too. Squealing or grinding noises often mean pads are wearing down. Metal on metal grinding is especially serious and demands immediate attention.
Check your rotors while inspecting the pads. Deep grooves in the rotor surface or blue discoloration from heat mean your braking system has been working overtime. Rotors below their minimum thickness marking also need replacement.
Regular inspections prevent brake failure before it happens. Make checking your pads part of your monthly maintenance routine. Spend just five minutes looking at pad thickness and rotor condition. This simple habit keeps you safe and helps you catch problems early. Your brakes protect you on every ride, so give them the attention they deserve.
How to Check Brake Pad Thickness and Wear
Checking your brake pad thickness is straightforward and takes just a few minutes. You don’t need special tools or expensive equipment to do this properly.
Start by looking at your brake pads from the side. Most pads have a wear line or groove molded into them. This line marks the minimum safe thickness. If your pads are worn down to that line, replacement time has arrived.
The critical measurement is 1 to 2 millimeters. Pads thinner than 1mm need immediate replacement. At 2mm, you should start planning your replacement soon. Use a simple ruler or caliper to measure the remaining pad material. Hold it against the pad and check the distance from the pad surface to the backing plate.
Visual inspection alone can be tricky sometimes. Pads wear unevenly depending on your riding style and brake type. One pad might wear faster than the other. Check both pads on each brake to catch uneven wear patterns.
Press the brake lever gently while observing the pads. They should move smoothly and sit evenly against the rotor. If one pad sits closer to the rotor than the other, that signals potential problems.
Listen for grinding sounds during braking. This noise means the backing plate is touching the rotor. Your brake pads have already worn through completely at this point.
Feel your braking power too. If you need to squeeze the lever harder to stop, your pads are likely worn thin. Reduced stopping power is a serious safety concern.
Take photos of your pads from the side view. Compare photos from month to month. This visual record helps you track wear speed over time.
Check your rotors while you’re inspecting the pads. Look for deep grooves or blue discoloration on the rotor surface. These signs mean the rotor needs attention alongside your pads.
Regular thickness checks keep you safe and prevent emergency brake failures on the trail or road.
Understanding Rotor Wear and When It Needs Attention
Your e-bike rotors work hard alongside your brake pads. They deserve regular attention too. When rotors wear down, your braking performance suffers even if your pads are new.
Deep grooves in your rotor surface signal wear. Run your finger across the rotor carefully. You should feel a relatively smooth surface. Visible channels or ridges mean replacement time is near. These grooves reduce contact between pads and rotor, making stops less effective.
Blue discoloration on your rotor indicates overheating. This happens during long descents or repeated hard braking. The metal changes color when temperatures spike. Overheating weakens the rotor and reduces stopping power. If you see blue patches, inspect the rotor thickness immediately.
Most rotors have a minimum thickness marking stamped on the side. This number is critical. Measure your rotor thickness with calipers if possible. When thickness drops below the marked minimum, replacement is necessary. Riding with thin rotors risks complete brake failure.
Uneven rotor wear often points to alignment issues. Your pads should contact the rotor evenly across its surface. If one side shows more wear than the other, your brake caliper may be misaligned. This problem affects both pads and rotors faster.
Pay attention to how your rotor looks and feels. Warped rotors cause pulsing sensations when braking. You’ll notice your brake lever moving in and out slightly. Warping usually means the rotor needs replacement.
Check your rotors during every brake pad inspection. Catching rotor problems early prevents expensive damage. A worn rotor can damage new brake pads quickly. Replacing both pads and rotor together often makes sense. This approach ensures your brakes work at peak performance and keeps you safe on every ride.
Soft vs. Hard Brake Pads: How Material Affects Wear and Performance
Brake pad material makes a huge difference in how long your pads last and how well they perform. Softer pads offer better modulation, meaning you get smoother, more controlled braking. They respond quickly to lever pressure and give you precise stopping power. However, softer materials wear down faster, so you’ll replace them more often.
Harder pads last much longer, which appeals to riders who want fewer replacements. They handle high speed stops and steep descents better because they resist heat buildup. The trade off is that harder pads need more lever pressure to achieve the same stopping force. They also take longer to warm up and reach full braking power.
Your riding style determines which material suits you best. If you ride mostly on flat terrain with gentle braking, softer pads work fine since you won’t stress them as much. Riders who tackle steep hills, perform frequent hard stops, or ride in wet conditions benefit from harder pads. These pads maintain consistent performance under demanding situations.
Temperature matters too. Softer pads can fade when brakes get very hot from continuous use. Hard pads resist this fade and keep working reliably. On the flip side, softer pads perform better in cold weather conditions.
The key is monitoring your specific pads regularly. Check thickness every few weeks if you ride frequently. Note how your brakes feel and respond to lever pressure. If you notice reduced stopping power or hear grinding sounds, it’s time to replace them regardless of material type.
Understanding your pad material helps you plan maintenance schedules and choose replacements that match your needs. Keep track of how long your current pads last. This information guides your next purchase decision and helps you budget for future maintenance costs.
Step-by-Step: Inspecting and Replacing Worn Brake Pads
Replacing your e-bike brake pads is a straightforward process that takes about 15 to 30 minutes. You’ll need basic tools like an Allen wrench, a small flathead screwdriver, and possibly a brake pad spreader tool. Most e-bikes use either disc brakes or rim brakes, so check your manual first to understand your specific system.
Start by removing your wheel from the frame. This gives you clear access to the brake caliper and pads. Locate the brake pad retention pin or bolt, which holds the pads in place. Use your Allen wrench to loosen and remove this fastener carefully.
Slide the old pads out of the caliper. Some pads have a metal backing plate that you’ll need to wiggle free. Take a moment to inspect the caliper itself for any damage or contamination. Wipe away any dirt or debris with a clean cloth.
Before installing new pads, you need to compress the brake pistons back into the caliper. This creates space for thicker new pads. Use your brake pad spreader tool or a flathead screwdriver to gently push the pistons inward. Work slowly and evenly on both sides to avoid damaging the pistons.
Slide your new brake pads into the caliper, making sure they sit flat and centered. The metal backing plate should face the piston, and the friction material should face the rotor. Reinsert the retention pin or bolt and tighten it securely with your Allen wrench.
Reinstall your wheel on the frame. Before riding, test your brakes by squeezing the lever several times while standing still. Your brakes should feel firm and responsive. Take a short test ride in a safe area to confirm everything works properly before returning to normal riding.
Common Mistakes That Lead to Brake Failure
Many riders make simple mistakes that lead to brake failure on their e-bikes. These errors happen because people don’t know what to watch for or skip important steps in maintenance.
Ignoring reduced braking power is one of the biggest mistakes. Your brakes feel less responsive, but you keep riding anyway. This happens because worn pads have less friction material left to grip the rotor. By the time your brakes fail completely, you’ve already put yourself in danger. Pay attention when your stopping distance increases.
Delaying replacement until complete failure is another common error. Some riders wait until their brakes barely work before taking action. This approach puts you at risk during emergency stops. Replace your pads before they wear completely through.
Difficulty assessing pad wear visually causes many people to guess wrong about replacement timing. You might think your pads look fine when they’re actually below the critical 1 to 2 millimeter threshold. Side view photos help, but even those can be deceiving in poor lighting. Use your fingers to feel pad thickness when you inspect them.
Neglecting rotor inspection during pad replacement is another frequent mistake. Your rotors wear alongside your pads. If you replace pads but ignore damaged rotors, your new pads will wear out faster. Check for deep grooves and blue discoloration every time you service your brakes.
Using the wrong pad material for your riding style creates problems too. Soft pads wear quickly if you ride downhill frequently or do high speed stops. Harder pads feel less responsive on technical terrain. Understand your pad type and riding habits before replacement.
Regular inspections prevent all these mistakes. Check your brake system every month or before long rides. This simple habit catches problems early and keeps you safe on every ride.
Building a Routine Brake Inspection Habit
Building a routine brake inspection habit keeps your e-bike safe and reliable. Start by inspecting your brakes every month, or more often if you ride frequently. This simple habit prevents surprises and catches problems early.
Set a specific day each month for your inspection. Many riders pick the first Sunday or the day they do other maintenance. Consistency matters more than the exact timing. Mark it on your calendar or set a phone reminder.
During each inspection, check three main things. First, look at your brake pad thickness. You need pads that are at least 1 to 2mm thick. If they’re thinner, replace them right away. Second, squeeze your brake lever and feel how it responds. Your brakes should feel firm and responsive, not spongy or weak. Third, spin your wheel and listen for rubbing sounds. Rubbing means your pads or rotors need attention.
Keep a simple inspection log. Write down the date, pad thickness, and any issues you notice. This log shows you patterns over time. You’ll learn how quickly your pads wear based on your riding habits. After a few months, you can predict when replacement is needed.
Make inspection part of your pre ride routine before long trips. Even a quick visual check takes 30 seconds. Look at your pads through the wheel spokes and feel your lever response. This catches problems before they become dangerous.
Store your inspection tools in one place. Keep a ruler or thickness gauge with your maintenance supplies. Having everything together makes inspections faster and easier.
The goal is making brake checks automatic. When inspection becomes habit, you’ll never miss worn pads or damaged rotors. Your brakes stay in top condition, and you ride with confidence knowing your safety system works properly.
Final Thoughts
Your brakes keep you safe on every ride. Knowing when to replace e-bike brake pads makes a real difference to your safety and confidence.
The 1 to 2mm thickness rule stays simple and easy to remember. Check your pads often and act fast when they get thin.
Worn pads never fix themselves. Waiting longer only leads to bigger problems and higher repair costs later.
Watch your rotors too. Deep grooves or blue discoloration mean something needs attention beyond just the pads.
Your riding style and pad material choice both matter here. Softer pads give better feel but wear out faster. Harder pads last longer but feel different during hard stops.
Pick what matches how you ride. There is no single right answer for every rider.
DIY replacement saves money and builds confidence. Most riders can swap pads in under 30 minutes with basic tools.
If you feel unsure, a professional mechanic can help. This costs more but gives peace of mind.
The biggest mistake riders make is ignoring small warning signs. Reduced stopping power or odd noises tell you something is wrong.
Don’t wait for complete failure before you act. Small problems grow into bigger dangers on the road or trail.
Make brake checks part of your routine. A quick monthly look keeps surprises away.
Your e-bike depends on good brakes to keep you steady and safe. Treat pad replacement as basic care, not an extra task.
Stay ahead of wear instead of reacting to it. This simple habit protects you, your bike, and everyone around you.
Good brakes mean good rides. Keep checking, keep riding, and keep safety first every time you roll out.
Frequently Asked Questions
How do I know when my e-bike brake pads need replacement?
Check your pad thickness regularly. Pads thinner than 1 to 2mm need replacement right away. Most pads have a wear line or minimum thickness indicator you can see. If you notice reduced stopping power or hear squeaking sounds, that’s another signal. Your brakes should feel responsive and confident every time you squeeze the lever.
What does it mean if my brake rotor looks discolored?
Blue discoloration on your rotor means it got too hot. This happens when brakes work overtime or pads wear down too far. Deep grooves in the rotor surface also signal damage. Check if the rotor thickness falls below the minimum marked on its edge.
Can I use any brake pad material on my e-bike?
Different pad materials have trade-offs. Softer pads give you better control and feel, but they wear out faster. Harder pads last longer and handle high-speed stops better. Your choice depends on how you ride. Consider your local terrain and riding style when selecting pads.
Why is regular inspection so important?
Regular checks catch problems early before they become dangerous. A monthly inspection takes just minutes and prevents brake failure on the road. You’ll spot wear patterns, rotor damage, and performance drops before they become serious issues.
Is it difficult to replace brake pads myself?
Most riders replace pads in under 30 minutes with basic tools. The process is straightforward once you understand the steps. If you feel unsure about any part, a professional mechanic can handle it for you.

Philips is the founder and lead writer at GearheadGarageFinds.com, a passionate automobile enthusiast who has spent years testing, comparing, and reviewing auto products and accessories to help fellow gearheads make smarter buying decisions. When he’s not under the hood or behind the keyboard, you’ll find him exploring the latest automotive innovations and hunting for the best garage finds on the market.