How to Fix a Flat Tire on an Electric Bike: Step-by-Step Guide
A flat tire can ruin your ride. It happens to every e-bike owner at some point. The good news is that you can fix it yourself with the right steps.
E-bikes come with extra parts like motors and batteries. This makes tire repair a bit different from regular bikes. You need to handle these parts with care.
Safety comes first when you fix an e-bike tire. Removing the battery before you start is a must. This simple step protects you and your bike.
In this guide, we will walk you through the full repair process. You will learn how to remove the wheel safely. We will also show you how to find and fix the puncture.
Rear wheel flats are the most common issue on e-bikes. We will cover why this happens and how to handle it. You will also learn tips to prevent flats in the future.
By the end of this article, you will feel confident fixing a flat tire. You can save time and money with simple know-how. Let’s get your e-bike back on the road.
In a Nutshell
Here is a quick summary to help you fix that flat tire fast:
-
Turn off the power and remove the battery before you touch anything. This keeps you safe from electrical surprises.
-
Take off the wheel using the right tools for your bike. Hub motor bikes need extra care during this step.
-
Pull out the damaged tube and check the tire’s inside for sharp objects or cuts. This stops the same problem from happening again.
-
Pre-inflate your new tube slightly before you put it in. This simple trick prevents pinch flats and saves you another repair.
-
Put the wheel back on correctly and check that everything spins smoothly.
-
Keep your tires at the right pressure going forward. This one habit prevents most flats before they start.
You can do this repair at home with basic tools and a bit of patience. Try a practice run when you are not in a rush. It builds confidence for real emergencies on the road.
Tools and Supplies You’ll Need Before You Start
Gathering the right tools makes your repair job much smoother. You don’t need expensive equipment. Most items sit in a standard garage or toolbox already.
Start with a bike repair stand. This holds your e-bike steady while you work. It frees both your hands to focus on the tire. Without a stand, you’ll struggle to balance the bike and fix the flat at the same time.
Next, grab your tire levers. These plastic or metal tools help you pry the tire away from the rim. They prevent damage to your wheel and make removal easy. You’ll need at least two levers for this job.
A pump is essential. You need one that fits your valve type, whether Schrader or Presta. Check your e-bike’s valve before buying or borrowing a pump.
Keep a new inner tube on hand. Make sure it matches your tire size exactly. Having a spare prevents delays when you’re stranded.
Bring a patch kit as backup. Even if you install a new tube, patches save you if you get another flat later.
Grab some sandpaper or a small file. You’ll use this to rough up the tire’s interior and find sharp objects that caused the puncture.
A flashlight or headlamp helps you see inside the tire clearly. Dark spots inside often hide thorns or glass.
Finally, wear work gloves to protect your hands. Tires harbor sharp debris that cuts skin easily.
Lay all these items nearby before you start. This preparation keeps you focused on the repair itself rather than hunting for tools mid-job.
Safety First: Powering Down and Removing the Battery
Powering down your e-bike properly protects both you and your bike during tire repair. Start by turning off the power switch on your bike’s display or control panel. This simple step prevents accidental motor activation while you work.
Next, locate your battery pack. Most e-bikes have batteries mounted on the frame, either on the downtube or rear rack. Some models feature removable batteries that slide out easily. Others require you to unlock a release mechanism first.
Remove the battery completely from the bike. This is the most important safety step. Even with the motor off, electricity still flows through the system when the battery stays connected. Removing it eliminates all electrical hazards during your repair work.
Store your battery in a safe, dry location away from your work area. Keep it on a clean surface where it won’t get damaged or wet. Never leave it sitting on concrete floors, as this can drain its charge over time.
After removing the battery, wait a few seconds before touching any electrical components. This brief pause lets any residual power discharge safely. You’ll now have a completely de-energized bike that’s safe to work on.
Check your bike’s manual if you’re unsure about battery removal steps. Different models have different release systems. Spending two minutes reading your manual prevents mistakes and potential damage.
Once your battery is safely removed and stored, you can confidently proceed with wheel removal. Your e-bike is now in a safe condition for full tire repair work. You’ve completed the most critical safety step in the entire process.
Removing the Wheel: Hub Motor vs. Non-Motorized Wheel
Hub motor wheels and non motorized wheels require different removal techniques. Understanding your bike’s setup matters before you start work.
Non motorized front wheels are the simplest to remove. Most use a quick release lever or bolt. Flip the lever open or unscrew the bolt counterclockwise. The wheel slides right out once the brake is disconnected. You may need to unhook a brake cable or remove a brake pad spacer depending on your model.
Rear wheels on non motorized bikes follow the same process. The chain adds one extra step. Shift to the smallest chainring first. This creates slack in the chain. Then remove the wheel as you would the front.
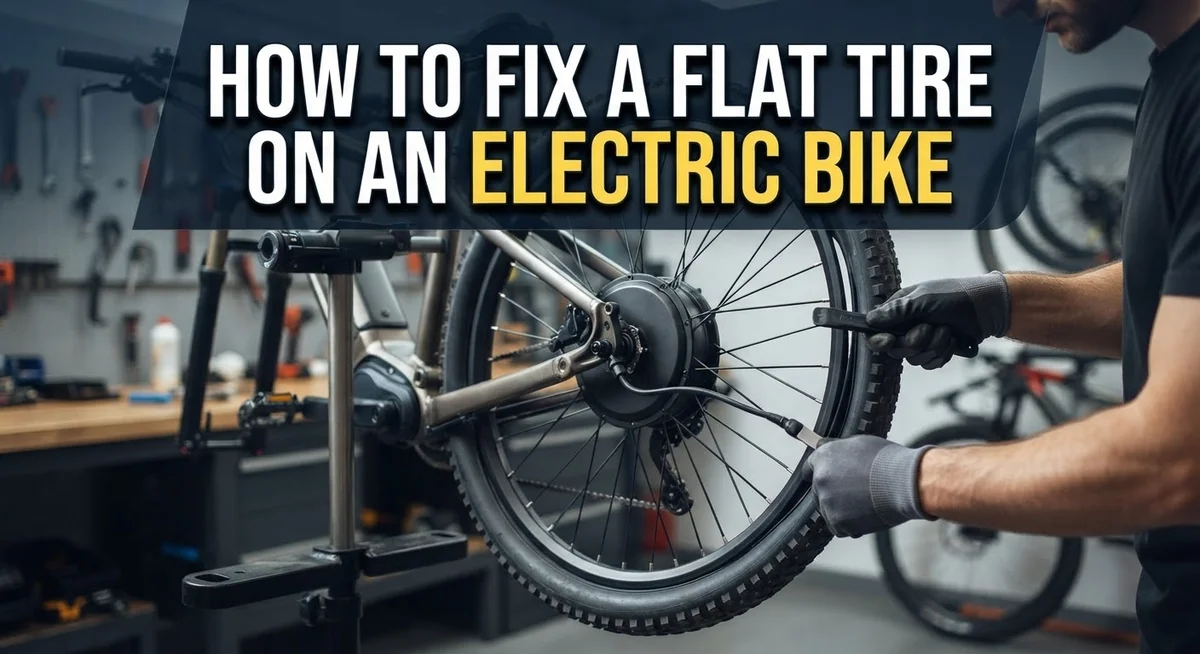
Hub motor wheels demand more care because the motor is built into the wheel itself. Never attempt to disassemble the motor itself. You only remove the entire wheel as a unit. Locate the motor’s electrical connector. This plug connects the motor to your bike’s wiring. Gently disconnect this connector before removing the wheel.
Hub motor rear wheels also have a chain. Follow the same chain slack procedure as non motorized bikes. Then disconnect the motor connector.
Pay attention to cable routing when removing hub motor wheels. Note how wires run along your frame. Take a photo with your phone before disconnecting anything. This photo helps you reconnect everything correctly later.
The wheel removal process itself stays the same once you disconnect the motor. Use the same tools and techniques. The key difference is handling the electrical connection properly.
Take your time with these connections. Rushing causes damage to delicate plugs and wires. Once disconnected, the wheel comes free just like any other bike wheel.
Step-by-Step: Extracting the Tube and Finding the Puncture
Once your wheel is off the bike, you can access the punctured tube. Start by using your tire levers to pry one edge of the tire away from the rim. Work slowly around the tire to avoid damaging it.
Gently pull the tube out from inside the tire. Be careful not to tear it further. Once the tube is completely free, set it aside for inspection.
Now comes the detective work. Look inside the tire carefully using your flashlight. Run your fingers slowly along the inner surface of the tire, feeling for sharp objects like thorns, glass, or metal shards. These items often cause punctures.
Check the rim tape as well. This thin protective layer prevents the tube from touching the metal rim. If the rim tape is damaged or missing, it can pinch your tube and cause flats.
Once you’ve cleared any debris, inspect the tire itself for damage. Look for cuts, tears, or bulges in the rubber. Small punctures might be repairable with your patch kit, but large tears mean you need a replacement tire.
Now examine the punctured tube. Slightly inflate it to locate the hole. Listen for air hissing out or feel for escaping air with your hand. Some punctures are obvious tears, while others are tiny pinhole leaks.
Mark the puncture location with a pen so you remember where the problem occurred. This helps you understand what caused the flat.
Before installing a new tube, remember this critical step: slightly pre-inflate the new tube first. This prevents pinch flats when you seat it inside the tire. A properly prepared tube and clean tire interior set you up for successful repair.
Installing the New Tube and Reseating the Tire Correctly
Start by positioning your wheel on a repair stand or flat surface. This keeps everything stable while you work. Take your new tube and check that it matches your tire size exactly. Using the wrong size causes serious problems during installation.
Before you seat the tube, slightly pre-inflate it using your pump. Add just enough air so the tube holds its shape. This step prevents pinch flats, which happen when the tube gets squeezed between the rim and tire. Pinch flats are common mistakes that riders regret.
Now carefully insert the valve stem through the rim hole first. This anchors your tube in place. Gently tuck the tube around the inside of the tire, working your way around the entire wheel. Move slowly and keep the tube centered. Twisted or bunched tubes cause problems when you ride.
Once the tube sits evenly inside the tire, begin seating the tire bead back onto the rim. Start at the valve stem and work in both directions. Use your hands to push the tire bead firmly onto the rim. You should hear small clicking sounds as the bead seats properly.
Check that the tube doesn’t pinch between the tire and rim as you go. Look carefully around the entire wheel. Push the tire bead down into the center channel of the rim to create space.
After the tire sits completely on the rim, inflate to the recommended pressure. Your bike’s manual shows the correct PSI range. Inflate slowly and check the tire bead alignment as pressure increases. The tire should seat evenly on both sides of the rim.
Finally, spin the wheel and watch for any wobbling or rubbing. A properly seated tire spins straight and true without touching the frame or brakes.
Reinstalling the Wheel and Reconnecting the Motor
Now that your tire is properly seated and inflated, you need to reinstall the wheel back onto your e-bike frame. This step differs depending on whether you have a hub motor or a standard wheel.
For front wheels, simply slide the wheel into the fork dropouts. Make sure the axle sits evenly in both sides. Tighten the quick release or axle nuts firmly so the wheel cannot shift during riding.
Rear wheels require more attention, especially on hub motor bikes. Align the wheel with the chain and sprocket. Slide the axle into both rear dropouts evenly. Check that the wheel sits centered in the frame before tightening anything.
Now comes the critical part: reconnecting the motor cable. Locate the connector where the hub motor plugs into your bike’s main harness. This connection usually sits near the rear dropout or along the chain stay. Handle the connector gently and align it properly before pushing it together. You should hear or feel a soft click when it seats completely.
Double check that the connector is fully seated by giving it a gentle tug. It should not come apart easily. Ensure no wires got pinched or bent during reinstallation.
After reconnecting the motor, spin the wheel by hand to confirm it rotates freely without rubbing. Listen for any unusual sounds. The wheel should turn smoothly without grinding or scraping noises.
Finally, reinstall your battery and secure it in its mounting bracket. Power on your e-bike and test the motor before taking a full ride. This simple test ensures everything reconnected properly and your repair was successful.
Common Mistakes That Lead to Repeat Flats
Many riders skip a crucial step before starting repairs. Forgetting to power off and remove your battery creates safety risks and makes the work harder. Always disconnect the battery first.
A major mistake happens during tube installation. Installing a new tube without pre-inflating it causes pinch flats almost immediately. These flats occur when the tube gets trapped between the tire and rim. Pre-inflate your new tube slightly before seating it. This simple action prevents most repeat punctures.
Riders often rush through tire inspection. You must check the inside of your tire for sharp objects, glass, or debris. Failure to find what caused the first flat means you’ll get another puncture soon. Take time to run your fingers carefully inside the tire. Check the rim tape too. A damaged rim tape can puncture tubes repeatedly.
Under-inflation causes more flats than any other factor. Many people don’t check tire pressure regularly. Low pressure makes your tire more vulnerable to pinch flats and punctures. Check your recommended pressure and maintain it consistently. This single habit prevents most repeat flats.
Another common error involves hub motor bikes. The rear wheel repair process differs from front wheel repairs on these bikes. Reconnecting the motor cable incorrectly can damage your e-bike. Follow your manufacturer’s instructions carefully.
Skipping practice runs creates problems during emergencies. If you’ve never repaired a flat before, practice in your garage first. You’ll work faster and make fewer mistakes when you actually need the repair.
Finally, many riders don’t inspect their tires regularly. Small damage gets worse quickly. Monthly visual checks catch problems early before they cause flats.
Preventing Future Flats on Your E-Bike
Keeping your e-bike tires flat-free requires consistent attention and simple habits. The single most effective step you can take is maintaining correct tire pressure. Check your tire pressure at least once per week, even if you haven’t ridden your bike. Under-inflated tires create sidewall stress and make punctures more likely.
Your tire pressure needs match your bike’s weight and your body weight combined. Heavier riders need higher pressure than lighter riders on the same bike model. Always inflate to the pressure range printed on your tire sidewall, not the rim.
Regular tire inspections catch problems before they cause flats. Spin each wheel slowly and look for embedded debris like glass, thorns, or metal shards. Feel the tire surface with your hand to spot small cuts or damage. Remove any objects you find using tweezers or a small tool.
Consider applying tire sealant as a preventative measure. This liquid fills small punctures automatically as they happen. Sealant works best for punctures under a certain size. It won’t fix large tears or sidewall damage.
Practice your repair skills before you need them. Do a trial repair in your garage using your repair stand. This builds confidence and muscle memory for roadside emergencies.
Store a spare tube, tire levers, and a portable pump in your e-bike bag. Check these supplies monthly to ensure nothing is missing or damaged.
Consistency matters most. Riders who check pressure weekly and inspect tires monthly experience far fewer flats than those who neglect maintenance. Your e-bike’s tires work harder than regular bikes because they carry extra motor weight, making prevention even more critical.
Final Thoughts
Fixing a flat tire on an electric bike is not hard once you know the steps. The process just needs patience and the right order of actions.
Safety always comes first. Removing the battery before touching the wheel protects you from electrical issues. This single habit prevents most repair accidents.
Hub motor bikes need extra care compared to regular bicycles. The motor cable connection makes rear wheel repairs slightly more complex. Front wheel repairs stay simple and quick on most e-bike models.
Your tools matter just as much as your technique. A good repair stand makes the whole job easier. Keep your tire levers and pump within easy reach during practice sessions.
Confidence comes from repetition. The first repair might feel confusing or slow. Each attempt after that becomes smoother and faster.
Think of flat tire repair as a basic skill every e-bike rider needs. You do not need to be a mechanic to master this process. Simple attention to detail makes all the difference.
Your e-bike depends on healthy tires for safe rides every time. Small efforts now prevent bigger problems later. A few minutes of care saves you from unexpected walks home.
Remember that rear wheel flats happen more often than front wheel flats. This fact alone makes rear wheel practice worth your time. Knowing this pattern helps you prepare better for real emergencies.
Treat every repair as a learning experience, not just a chore. Each fix teaches you something new about your bike’s mechanics. This knowledge builds real confidence for future rides.
Flat tires will happen eventually, but they do not have to ruin your day. With the right steps and a calm approach, you can handle them quickly. Your e-bike will get you back on the road in no time.
Frequently Asked Questions
Can I repair my e-bike flat tire in my garage?
Yes, you can repair your flat tire at home. You need a repair stand, tire levers, a pump, and a replacement tube or repair patch. Set up your bike securely so the wheel hangs freely. Work in a clean, dry space with good lighting. Most riders find garage repairs much easier than roadside fixes because you have time and proper tools available.
Why do hub motor bikes need different repair steps?
Hub motor bikes have the motor built into the wheel itself. This makes the wheel heavier and more complex than standard bike wheels. You need to handle the motor wiring carefully during removal. Always disconnect the motor cable before pulling the wheel off. Take photos during disassembly so you remember how to reconnect everything correctly.
Should I practice flat tire repairs before I need them?
Absolutely. Practice runs save you from panic during actual emergencies. Do a dry run in your garage when your tires are fine. Remove the wheel, take out the tube, and reinstall everything. This builds confidence and muscle memory. When a real flat happens, you’ll know exactly what to do instead of fumbling with unfamiliar steps.
What causes pinch flats during tube installation?
Pinch flats happen when you install a tube without pre-inflating it first. Slightly inflate your new tube before seating it in the tire. This creates a small cushion that prevents the tire bead from pinching the tube. After seating the tube, inflate fully to your recommended pressure. This simple step prevents most repeat flats from installation mistakes.
How often should I check my tire pressure?
Check your tire pressure weekly for best results. Tires naturally lose air over time. Your e-bike carries extra weight from the motor and battery, so proper pressure matters even more. Correct pressure is your single most effective flat prevention tool. Maintain the pressure listed on your tire sidewall for your bike weight and body weight combined.

Philips is the founder and lead writer at GearheadGarageFinds.com, a passionate automobile enthusiast who has spent years testing, comparing, and reviewing auto products and accessories to help fellow gearheads make smarter buying decisions. When he’s not under the hood or behind the keyboard, you’ll find him exploring the latest automotive innovations and hunting for the best garage finds on the market.