How to Replace E-Bike Brake Pads: Step-by-Step Guide
Your e-bike carries more weight than a regular bike. This extra weight puts more strain on your brakes. That means your brake pads wear out faster than you might expect.
If you hear squeaking or grinding sounds, pay attention. These noises often mean your brake pads need attention soon. Reduced stopping power is another clear warning sign you should never ignore.
Most riders need to replace their brake pads every 400 to 500 miles. Your exact mileage depends on your weight, the terrain you ride, and your braking habits. Hillside riders often wear through pads much faster.
The good news? Replacing e-bike brake pads is a simple task. You do not need special skills or expensive tools. This guide walks you through every step clearly.
We will show you how to spot worn pads early. You will learn the exact tools needed and the correct replacement process. We also cover common mistakes riders make and how to avoid them.
By the end, you will feel confident handling this maintenance task yourself. Your brakes will work safely, and your rides will feel smoother.
In a Nutshell
Here’s a quick summary to keep in mind:
-
Watch for warning signs. Reduced stopping power, squeaking, or grinding noises mean your pads need attention soon.
-
Gather your tools first. You will need an Allen key or screwdriver to loosen and tighten the brake bolts.
-
Follow a simple process. Loosen the bolts, remove the old pads, insert new ones, then tighten everything back up.
-
Clean as you go. Always clean the rotors and pad surfaces during replacement. This removes dust and debris that cause noise.
-
Avoid touching friction surfaces. Oil from your fingers can ruin brake performance. Handle pads by their edges only.
-
Test before you ride. Squeeze the brake levers a few times and check for rotor rubbing. This step is not optional.
Riders on hilly terrain should check their pads more often. Heavier braking wears pads down faster. Staying ahead of wear keeps your e-bike safe and responsive on every ride.
Signs It’s Time to Replace Your E-Bike Brake Pads
Your e-bike’s braking system works harder than a standard bike’s brakes. The extra weight means your pads wear down faster. Knowing when to replace them keeps you safe and saves money on repairs.
Reduced stopping power is the first sign something is wrong. Your bike should stop quickly when you squeeze the levers. If you need to brake harder or earlier than usual, your pads are likely worn thin. This happens gradually, so pay attention to how your brakes feel on familiar routes.
Squeaking and grinding sounds tell you a lot. A light squeak often means dirt or moisture on the pads. A loud grinding noise is more serious. It means the pad material is almost gone and metal is rubbing against the rotor. Stop riding and replace your pads immediately when you hear grinding. Continuing to ride damages your rotor and makes repairs more expensive.
Visual inspection matters too. Look at your brake pads from the side. Most pads have a wear indicator line or groove. When the pad surface reaches that line, replacement time has arrived. Some pads wear unevenly. This happens when your wheel is slightly misaligned or your brake is not adjusted properly.
Braking feels spongy or soft when pads are severely worn. Your lever moves too far before the brakes engage. This reduces your control and increases stopping distance. Never ignore this warning sign.
Temperature changes affect brake performance. If your brakes feel weak after long downhill rides or in cold weather, worn pads may be the cause. Fresh pads restore reliable braking in all conditions.
Tools and Materials You’ll Need
Before you start replacing your e-bike brake pads, gather everything you need. Having the right tools and materials ready makes the job faster and easier.
Allen keys or screwdrivers are your main tools. Check your brake pad bolts to see which size you need. Most e-bikes use either metric Allen keys or standard screwdrivers. Keep both types handy just in case.
You will need new brake pads designed for your specific brake system. Mechanical disc brakes are standard on e-bikes, so purchase pads that match your brake model. Check your owner’s manual or the brake manufacturer’s information to find the correct type.
A clean rag or cloth is essential. You will use this to wipe away dust, dirt, and old brake residue from the rotors and brake caliper. Keep it nearby throughout the replacement process.
Brake cleaner or rubbing alcohol helps remove oil and grime. These liquids prepare friction surfaces so your new pads work properly. Never skip this step because contaminated surfaces reduce braking power.
Consider having a small container to hold your old pads and bolts. This prevents losing small parts during the replacement. Organization keeps your workspace tidy and safe.
A bike stand or support makes the job much easier. It holds your e-bike steady while you work on the brakes. If you don’t have one, lean your bike against a wall carefully.
Finally, keep your owner’s manual or brake documentation nearby. Different brake systems have slightly different procedures. Having the right information prevents mistakes and ensures you install pads correctly.
Step-by-Step: How to Replace E-Bike Brake Pads
Start by positioning your e-bike on a stable work surface. A bike stand or support keeps the wheel steady and gives you clear access to the brake components. You need both hands free to work safely.
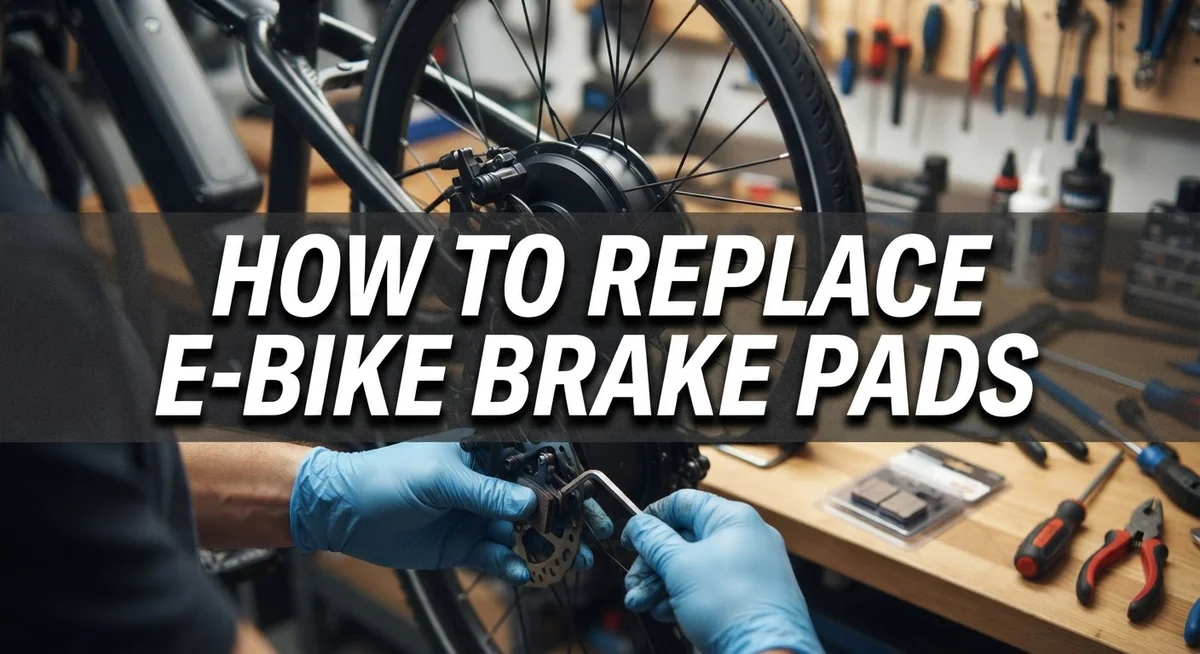
Locate the brake caliper on your wheel. This metal housing holds your brake pads. You will see two bolts securing the pads inside the caliper. Use your Allen key or screwdriver to loosen these bolts. Turn slowly and do not remove them completely yet. You just need enough space to slide the old pads out.
Gently pull the worn brake pads away from the rotor. The rotor is the metal disc that spins with your wheel. Set the old pads aside in your container. Now inspect the rotor surface. If you see dirt, oil, or debris, wipe it clean with your rag. Use brake cleaner or rubbing alcohol for stubborn grime. A dirty rotor reduces braking power significantly.
Slide your new brake pads into the caliper. Make sure they sit flat against the rotor. The pads should fit snugly without forcing. Once positioned correctly, tighten the bolts firmly. Do not over tighten, as this can crack the pads. Tighten just enough so the pads cannot move.
Squeeze your brake levers several times. This pushes the pads closer to the rotor. Listen and feel for any grinding or rubbing sounds. The brakes should feel responsive and smooth. If the rotor rubs against the pads, you may need minor caliper adjustments. Test your brakes gently before riding. Spin the wheel by hand and apply the brakes. Everything should feel normal and responsive before you hit the road.
How to Clean Pads and Rotors for Optimal Performance
Cleaning your brake pads and rotors is one of the most important steps in maintaining your e-bike’s stopping power. Oil and dirt buildup reduce friction and make your brakes less effective. You want clean surfaces for maximum performance.
Start by inspecting both your pads and rotors for any visible grime or residue. Dust and brake material accumulate over time. Use a clean, dry cloth to wipe away loose particles first.
For deeper cleaning, use brake cleaner or rubbing alcohol on a soft cloth. Gently wipe the friction surface of each pad. Do the same for both sides of your rotor. Work slowly and let the surfaces dry completely before reassembling.
Never touch the cleaned surfaces with your bare fingers. Skin oils transfer instantly and compromise braking performance. Wear gloves or use a clean cloth when handling components.
Pay special attention to the rotor edges and pad backing plates. Contamination hides in these spots. A small brush helps reach tight areas between the caliper and rotor.
Clean your components during every pad replacement, not just occasionally. This habit prevents performance problems and extends brake life. You’ll notice smoother, more responsive braking immediately after cleaning.
Allow everything to air dry for a few minutes. Moisture can affect initial braking feel. Once dry, reinstall your pads and test your brakes gently before riding.
Regular cleaning between replacements also helps. Every few weeks, wipe your rotors with a dry cloth during routine maintenance. This simple habit keeps your e-bike’s brakes in top condition and ensures reliable stopping power when you need it most.
Testing and Adjusting Brakes After Installation
After you install new brake pads, testing is essential. Your e-bike brakes must work properly before you ride again. Start by squeezing your brake levers slowly in a safe, empty area. Feel for smooth resistance and listen for any unusual sounds.
Spin your wheel and watch the rotor carefully. The rotor should pass through the caliper without touching the pads. If you hear rubbing or scraping, the pads are misaligned. Stop and check that both pads sit evenly on each side of the rotor.
Apply moderate braking pressure and notice how your bike responds. Your stopping power should feel firm and consistent. If braking feels weak or spongy, air may be trapped in the brake line. Squeeze your levers repeatedly to push out air bubbles.
Test your brakes at different speeds. Ride slowly at first, then gradually increase speed. Apply brakes gently, then with more force. Your bike should slow smoothly without pulling to one side. Uneven braking means one pad is closer to the rotor than the other.
Listen for squeaking or grinding during your test ride. New pads sometimes squeak initially, but this should stop after a few rides. Grinding sounds indicate a serious problem that needs immediate attention.
Check your brake lever feel regularly over the next few rides. Brakes improve as new pads bed in properly. Lever resistance should remain consistent. If performance changes suddenly, inspect your pads and rotors again.
Take time to adjust your brake caliper if the rotor rubs. Loosen the caliper mounting bolts slightly. Squeeze your brake lever and retighten bolts while the lever is held. This centers the caliper perfectly over the rotor.
Common Mistakes to Avoid During Brake Pad Replacement
Replacing e-bike brake pads seems straightforward, but small mistakes can hurt your safety and waste money. Here are the errors you should avoid.
Touching friction surfaces is the biggest mistake riders make. Your fingers leave oils that reduce braking power instantly. Always wear gloves or use tools to handle new pads. Never let your skin contact the pad material or rotor surface.
Skipping the cleaning step causes problems fast. Many people install new pads without cleaning the rotor or old pad residue. Dirt and grime trapped between surfaces reduce stopping power significantly. Spend a few minutes cleaning everything before installation.
Tightening bolts incorrectly creates two opposite problems. If you overtighten, you crack the pads or bend the caliper. If you undertighten, the pads shift during braking and wear unevenly. Use steady, moderate pressure when securing bolts. Tighten gradually in small turns rather than one hard motion.
Forgetting to test your brakes after replacement puts you at risk. New pads need a short break in period. Spin your wheel and check that the rotor doesn’t rub. Ride slowly first to feel how the brakes respond before riding at normal speeds.
Installing pads backward happens more often than you’d think. Check your manual to confirm which side faces the rotor. Wrong installation means poor braking and potential pad damage.
Not replacing both brake pads together creates uneven wear. Replace the front and rear sets at the same time. This keeps your braking balanced and prevents one side from working harder than the other.
Finally, ignoring replacement frequency causes brake failure. E-bikes are heavy and wear pads faster than regular bikes. Check your pads every 400 to 500 miles depending on your terrain and riding style.
How Often Should You Replace E-Bike Brake Pads
E-bike brake pads wear faster than regular bike pads. The extra weight of your e-bike puts more pressure on your brakes every time you stop. This means you need to replace pads more often to stay safe.
Most riders replace brake pads every 400 to 500 miles. This distance varies based on several factors. Your weight, riding style, and terrain all affect how quickly pads wear down.
Riders who frequently brake on hills experience much faster wear. If you ride in mountainous areas, check your pads every 300 miles instead. Casual riders on flat terrain might go longer between replacements.
Your braking habits matter significantly. Riders who brake hard and suddenly wear pads faster than those who brake gradually. Smooth, gentle braking extends pad life considerably.
Pay attention to warning signs before you hit the mileage mark. Listen for squeaking or grinding sounds during rides. These noises tell you pads are getting thin. Reduced stopping power is another clear indicator. If your bike feels less responsive when braking, replacement time has arrived.
Visual inspection is your best tool. Look at your brake pads through the wheel spokes. Most pads have a minimum thickness line. When your pads reach this line, replace them immediately.
Don’t wait for complete failure. Worn pads damage your rotors, which costs more money to fix. Replacing pads on schedule keeps rotors healthy and your braking system working properly.
Check your pads monthly if you ride frequently. Quick visual checks take seconds and prevent safety problems. Regular checks help you catch wear early and maintain consistent stopping power throughout the year.
Troubleshooting Common Brake Issues After Replacement
After you install new brake pads, problems can still happen. Your brakes might feel weak, make noise, or rub against the rotor. Let’s walk through the most common issues and how to fix them.
Weak braking power usually means air got trapped in your brake lines or your pads need bedding in. Squeeze your brake lever several times while stationary. This helps push air out. Then take a short, slow ride and apply moderate pressure repeatedly. Your pads need friction and heat to work properly.
Rubbing sounds happen when your rotor touches the pads while spinning. Stop and spin your wheel slowly by hand. Watch where the rotor sits inside the caliper. If it touches the pads, your caliper needs adjustment. Loosen the caliper bolts slightly and center it over the rotor. Tighten the bolts again and test.
Squeaking noises often come from dust or moisture on the friction surfaces. Remove your wheel and inspect both sides of the rotor and pads. Wipe everything clean with a dry cloth. Moisture from cleaning or rain can cause squeaking that disappears after a few rides.
Spongy brake lever feel suggests your brake system has air inside. This requires bleeding your brakes, which involves removing air bubbles from the hydraulic lines. Check your e-bike manual for specific bleeding procedures since methods vary by brake type.
Pads wearing unevenly means one pad wears faster than the other. This points to caliper misalignment. Loosen the mounting bolts and center the caliper properly over the rotor.
If problems persist after these checks, your brake system may need professional service to ensure safe operation.
Final Thoughts
Replacing your e-bike brake pads is a simple job once you know the steps. You loosen the bolts, remove the old pads, and slide in new ones. Then you tighten everything back up and test your brakes before riding.
Your e-bike depends on strong brakes more than a regular bike does. The extra weight from the motor and battery puts more strain on your pads. This means they wear out faster and need more attention.
Regular checks help you catch problems early. A quick glance at your pads every few weeks can save you from a dangerous situation later. Don’t wait until you hear grinding noises or feel weak stopping power.
Clean pads and rotors make a big difference in how well your brakes perform. Keeping these surfaces free from oil and dirt helps your new pads grip properly from the start. This small step prevents many common issues riders face.
Safety should always come first when you work on your brakes. Take your time during installation. Rushing through bolt tightening or skipping the test ride can lead to accidents.
Every rider has different habits and terrain. Someone riding hills daily will replace pads more often than someone on flat roads. Pay attention to how your bike performs and adjust your maintenance schedule accordingly.
Brake pad replacement is not a complicated task. With the right tools and a bit of patience, you can handle this maintenance yourself. Just remember to check your work carefully and never skip the testing step.
Your safety on the road depends on brakes that work when you need them most.
Frequently Asked Questions
Can I replace just one brake pad instead of both?
No, you should replace both pads at the same time. When you replace only one pad, the new pad wears at a different rate than the older one. This creates uneven braking and reduces stopping power. Both pads should be fresh to work together properly.
What happens if I touch the friction surface while installing new pads?
Touching the friction surface with your bare hands transfers oils and dirt onto the pad. This reduces grip and causes poor braking performance. Always handle pads by the sides or wear clean gloves. If you accidentally touch the surface, wipe it clean with a lint free cloth before installation.
How do I know if my brake pads are installed correctly?
Test your brakes in a safe area before riding on busy roads. Squeeze the brake lever firmly and listen for rubbing sounds. The pads should grip the rotor smoothly without touching it when you’re coasting. If you hear grinding or squeaking, stop and check your installation. Proper alignment prevents rotor damage and ensures safe stops.
Why do my brakes feel weak after I install new pads?
New pads need a break in period called bedding in. Squeeze your brakes gently 10 to 15 times to transfer material onto the rotor. This creates better contact and improves stopping power. If brakes still feel weak after bedding in, air may be trapped in your brake lines and you may need professional help.
Should I clean my rotor when I replace the pads?
Yes, absolutely. Use a clean, dry cloth to wipe the rotor before installing new pads. Dust and moisture on the rotor reduce friction and cause squeaking. Clean surfaces help your new pads perform at their best. This simple step takes just a minute and makes a big difference in braking quality.

Philips is the founder and lead writer at GearheadGarageFinds.com, a passionate automobile enthusiast who has spent years testing, comparing, and reviewing auto products and accessories to help fellow gearheads make smarter buying decisions. When he’s not under the hood or behind the keyboard, you’ll find him exploring the latest automotive innovations and hunting for the best garage finds on the market.