How to Inspect E-Bike Brakes: A Complete Safety Guide
Your e-bike brakes work harder than regular bike brakes. The extra weight and motor power mean your braking system faces more stress every ride.
That’s why regular brake checks matter so much. A small issue today can turn into a dangerous failure tomorrow.
Many riders trust their brakes just by how they feel. This is a huge mistake, especially with hydraulic systems.
Hydraulic brakes often feel smooth and responsive right up until they fail. Mechanical brakes usually give you more warning signs. Both types need proper inspection to stay safe.
This guide walks you through everything you need to know. You will learn how to diagnose brake condition and spot pad wear early.
We will show you how to check your rotor for damage and verify proper caliper alignment. You will also discover a simple functional test you can do in seconds.
By the end, you’ll know exactly how to adjust your brakes and avoid the common mistakes that put riders at risk. Let’s get your brakes checked and keep you rolling safely.
In a Nutshell
Here’s a quick summary to keep in mind:
-
Check both brake types differently. Hydraulic brakes hide wear until they fail suddenly. Mechanical brakes show wear signs much earlier.
-
Inspect pads regularly. Look for thin pads or uneven wear patterns. Worn pads reduce stopping power fast.
-
Examine the rotor closely. Make sure it isn’t bent, squished, or damaged. A warped rotor causes uneven braking.
-
Verify caliper alignment. The caliper should sit straight over the rotor. Misalignment creates rubbing or weak stopping force.
-
Run a simple functional test. Pull the brake lever and push your bike forward. Your bike should resist movement immediately.
-
Don’t trust feel alone. Hydraulic brakes can feel smooth right before they stop working. Always inspect parts directly instead of guessing.
-
Adjust brakes when needed. Small tweaks to pads, rotors, or calipers keep your ride safe. Skipping this step leads to bigger problems later.
Following these steps helps you catch brake issues early. This keeps every ride safer and more predictable.
Hydraulic vs. Mechanical Brakes: Know Your System
Your e-bike has one of two brake systems: hydraulic or mechanical. Each type works differently and needs its own inspection approach.
Mechanical brakes use a cable connected to brake pads. When you pull the lever, the cable tightens and pushes the pads against the rotor. These brakes show wear gradually. You’ll notice the lever feels softer or travels farther before stopping your bike. Mechanical brakes give you early warning signs.
Hydraulic brakes use fluid pressure instead of cables. They feel smooth and responsive for a long time. This is their biggest weakness. Hydraulic brakes can feel perfect one day and fail the next because fluid leaks slowly without obvious signs. You won’t feel the problem coming.
Here’s what this means for your inspection routine. With mechanical brakes, check the cable for fraying or rust. Look at the brake pads for thickness and even wear. Test the lever resistance by hand.
With hydraulic brakes, you can’t rely on feel. You must physically inspect the pads and rotor. Look inside the caliper to see if pads are thin. Check for fluid leaks around the brake lines or caliper. Hydraulic systems need more frequent visual checks because they hide problems.
Both systems need the same rotor inspection. Spin your wheel and watch the rotor. It should not rub against the pads or wobble side to side. A bent or damaged rotor means your brakes won’t work properly.
The key difference is simple. Mechanical brakes warn you before failure. Hydraulic brakes don’t. This means hydraulic brake owners must inspect more often and never skip a check.
Step-by-Step: How to Inspect Your E-Bike Brakes
Start by gathering what you need. You’ll want a flashlight, a ruler or caliper, and a clean cloth. Park your e-bike on a stand so both wheels spin freely.
Check your brake pads first. Spin the wheel and look through the caliper window. You should see the pads pressing against the rotor. Measure the pad thickness. Most pads need replacement when they reach 1mm or less. Uneven wear means your caliper isn’t aligned properly.
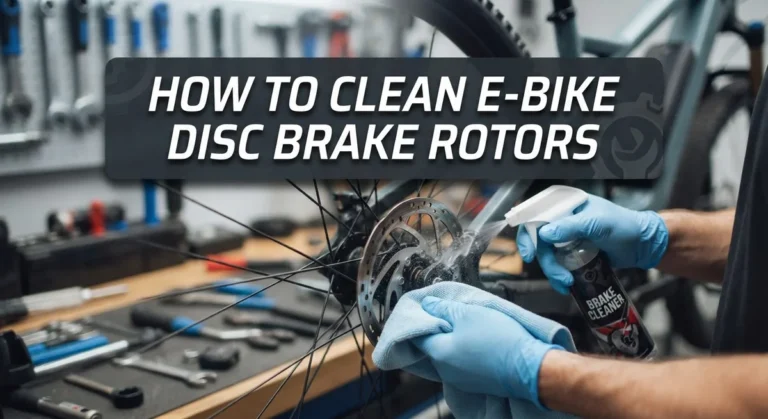
Inspect the rotor next. Spin the wheel slowly and watch the rotor pass through the caliper. Look for bending, warping, or scoring marks. A bent rotor will rub against the pads. Run your finger gently along the rotor surface to feel for rough spots or damage. Rotors should be smooth and straight.
Test caliper alignment carefully. The rotor should sit centered between the pads with equal space on both sides. If the rotor touches one pad more than the other, the caliper has shifted. Spin the wheel again and listen for rubbing sounds.
Perform the functional test. Pull the brake lever firmly and hold it. Push your bike forward. Your e-bike should resist movement strongly. Release the lever and spin the wheel. It should rotate freely without dragging.
Check hydraulic systems specifically. Look at the brake lines for cracks or leaks. Fluid loss means your brakes will fail. Mechanical brakes need cable inspection instead. Look for fraying or corrosion on the cable.
Document what you find. Take photos of any damage. This record helps you track when maintenance is due. Repeat this inspection every month or after heavy riding.
Checking Brake Pad Wear and Condition
Brake pad wear is the most common reason e-bike brakes fail. Your pads compress over time as you ride, and checking them regularly keeps you safe.
Start with a visual inspection. Spin your wheel slowly and look through the small window on the brake caliper. You should see the brake pads sitting on both sides of the rotor. Most pads have a wear indicator line or groove molded into them.
If the pads look thin or nearly flat, they need replacement soon. Uneven wear is also a red flag. One pad wearing faster than the other means your caliper isn’t aligned properly or your rotor is bent.
The difference between brake types matters here. Mechanical brakes show wear more obviously because you can see the cable tension change and feel the lever getting softer. Hydraulic brakes are trickier. They feel fine until the pads are almost gone, then suddenly your braking power drops.
For hydraulic systems, don’t trust how the lever feels. Instead, measure the pad thickness directly. Look for any visible gap between the pad material and its backing plate. If the backing plate is touching the rotor, you’ve waited too long.
Check for glazing too. If your pads look shiny or polished instead of textured, they’ve overheated. Glazed pads don’t grip the rotor well and reduce stopping power.
Document what you see. Take photos of pad thickness and wear patterns. This helps you spot problems early and prevents brake failure on the trail. Regular checks every month or two catch issues before they become dangerous.
Inspecting the Rotor for Damage and Warping
The rotor is the metal disc your brake pads squeeze against. When it warps or gets damaged, your brakes won’t work smoothly. Inspect it carefully every time you service your brakes.
Start by spinning your wheel slowly. Watch the rotor pass through the brake caliper. The rotor should stay centered between the pads without touching either side. If it rubs on one pad, the rotor has likely warped.
Look for visible damage on the rotor surface. Check for deep scratches, gouges, or dents. Small surface marks are normal, but large gouges mean the rotor needs attention. Run your finger across the rotor face to feel for rough spots or raised edges.
Warping happens for several reasons. Heat buildup is the main culprit. Repeated hard braking generates friction that warps the metal over time. Crashes or impacts can also bend rotors instantly. Even minor falls can throw a rotor out of alignment.
Check both sides of the rotor. Spin the wheel and observe from different angles. A warped rotor will wobble or move side to side as it rotates. The gap between the rotor and pads should stay even all the way around.
Pay special attention to the rotor edges. They can bend inward or outward, causing rubbing. Look at the mounting bolts too. Loose bolts let the rotor shift and cause misalignment.
Document any damage you find. Take photos if possible. This helps you track changes over time. Minor warping under 1mm usually works fine. Larger warping requires adjustment or replacement to restore proper braking power and safety.
Verifying Caliper Alignment and Adjustment
Caliper alignment is critical for brake performance and safety. A misaligned caliper causes uneven pad wear, poor stopping power, and annoying rubbing sounds. You need to check this regularly during your inspection routine.
Start by spinning your wheel slowly while watching the rotor pass through the brake caliper. The rotor should sit centered between the brake pads with equal space on both sides. If the rotor rubs against one pad more than the other, your caliper needs adjustment.
Look for visible gaps between the rotor and each pad. One side should not have a noticeably larger gap than the other. Uneven spacing means the caliper has shifted out of position.
Check for rubbing sounds during the spin test. A grinding or squealing noise often indicates misalignment. Listen carefully as the wheel completes several full rotations.
Most e-bike calipers have adjustment bolts that let you move the caliper slightly left or right. These bolts sit on either side of the caliper body. Loosening one bolt and tightening the other shifts the entire caliper to center the rotor properly.
Make small adjustments only. Turn each bolt a quarter turn at a time, then spin the wheel to check your progress. Large adjustments can cause new problems.
Test your work by spinning the wheel multiple times. The rotor should pass through without touching either pad. You should hear no rubbing or grinding sounds.
If your caliper still rubs after adjustment, the rotor itself might be bent. Return to your rotor inspection notes. A damaged rotor requires replacement, not just caliper tweaking.
Document your alignment findings. Note which direction the caliper was misaligned and how many adjustments you made. This record helps you spot recurring problems over time.
Performing the Brake Functional Test
A functional brake test tells you whether your e-bike’s braking system actually works when you need it. This test is simple but essential for safety.
Start by finding a flat, open area away from traffic. You need space to test your brakes without risk. Pull the brake lever firmly and hold it in place. The lever should feel solid and not move all the way to the handlebar. If the lever travels too far, your brakes need adjustment or maintenance.
Now push your e-bike forward slowly while keeping the brake engaged. Your bike should resist movement and stop within a short distance. If the bike keeps rolling easily, your brakes aren’t providing enough stopping power. This is a red flag that requires immediate attention.
Test both brakes separately. Many e-bikes have front and rear brakes that work independently. Pull only the front brake lever and push forward. Then test the rear brake alone. Each brake should provide firm resistance. They don’t need to feel identical, but both must work effectively.
Pay attention to how the brake feels during this test. Does the lever pulse or feel spongy? Spongy brakes often mean air is trapped in hydraulic lines. Pulsing can indicate rotor warping or pad wear issues.
Repeat this test multiple times. Brakes sometimes fail after the first or second application rather than immediately. This reveals problems that a single test might miss.
Document your findings. Note whether each brake responded consistently. Record any unusual sounds, vibrations, or lever behavior. This information helps you identify what needs repair before your next ride.
Common Mistakes to Avoid When Inspecting Brakes
Skipping visual checks is one of the biggest mistakes riders make. Many people assume their brakes work fine because the lever pulls smoothly. This false confidence puts you at real risk on the road.
Relying only on how the brake feels is dangerous. Hydraulic brakes especially hide problems until they become serious. The lever might feel normal even when pads are nearly gone. You need to actually look at the pads and rotor with your eyes.
Another common error is ignoring one brake while focusing on the other. Your front and rear brakes wear at different rates depending on your riding style. Check both systems equally. Test both brakes separately during your functional test too.
Many people skip the rotor inspection entirely. They focus only on pads and forget the disc itself needs checking. A warped or damaged rotor causes poor braking even with fresh pads installed.
Not documenting your findings creates problems later. You won’t remember exactly how much pad thickness remained or what noises you heard. Take photos or write notes about what you observe. This helps you spot changes between inspections.
Rushing through adjustments is another mistake to avoid. Making big caliper adjustments at once often creates new problems. Small, careful movements work better. Test after each tiny change.
Finally, many riders skip the functional test completely. Spinning your wheel while watching for rubbing takes just minutes. It catches alignment issues before they cause brake failure on a ride. Make this test part of your regular routine every month.
Maintaining Hydraulic Brake Systems
Hydraulic brake systems use fluid pressure to stop your e-bike. They work differently from mechanical brakes, so inspection requires specific steps.
Start by checking your brake fluid level. Look at the reservoir or sight window on your brake lever or caliper. The fluid should reach the marked line. Low fluid means your system has a leak or the pads are wearing down. Either way, you need to investigate further.
Next, inspect the brake hose for damage. Run your fingers along the entire length. Feel for cracks, splits, or soft spots in the rubber. A damaged hose will leak fluid and reduce braking power. Replace any hose showing visible wear.
Check the caliper body for leaks around the piston area. Dried fluid residue or wet spots indicate a seal problem. This reduces braking performance and requires professional service to fix properly.
Examine where the hose connects to the caliper and lever. These connection points should be tight and dry. Loose fittings cause fluid loss and air bubbles in the system.
Air in hydraulic lines is dangerous. Spongy brake feel or a lever that moves too far down usually means air is trapped inside. This requires bleeding the brakes to remove air bubbles.
Look at the brake pads through the caliper window. Hydraulic pads wear gradually, so check thickness regularly. Pads thinner than 1 millimeter need replacement soon.
Test brake response by squeezing the lever gently. It should feel firm and responsive. The lever shouldn’t move more than halfway to the handlebar when braking hard.
Document what you find with photos or notes. Track when you last serviced the system. Regular inspection keeps your hydraulic brakes safe and reliable for every ride.
Final Thoughts
Checking your e-bike brakes does not need to feel like a big chore. It just needs a regular spot on your maintenance list.
Small checks today prevent big problems tomorrow. A few minutes of inspection can save you from a scary ride later.
Remember that hydraulic and mechanical brakes behave differently. Hydraulics often feel fine right up until they fail. Mechanical brakes usually show wear signs earlier.
This means you cannot trust feel alone. You need to look at the pads, check the rotor, and test caliper alignment every single time.
Make the functional test part of your routine. Pull the lever, push the bike, and feel for real resistance. This simple test tells you more than guessing ever will.
Do not skip the small details either. A squished rotor or a misaligned caliper can turn into a bigger safety issue fast.
If you ride often, check your brakes weekly. If you ride less, a monthly check still keeps you safe on the road.
Hydraulic systems need their own care too. Keep an eye on fluid levels and watch for any signs of leaks around the caliper.
Document what you find each time you inspect. Notes on pad thickness or rotor condition help you spot changes early.
Good brakes mean good control. That control keeps you safe on every ride, whether you are commuting or cruising for fun.
Treat brake inspection as part of normal e-bike ownership, not an extra task. It fits right alongside charging your battery or checking tire pressure.
With steady habits and a little attention, your e-bike brakes will stay reliable. You will ride with more confidence, knowing your brakes are ready when you need them most.
Frequently Asked Questions
How often should I inspect my e-bike brakes?
Inspect your brakes weekly if you ride often. Check them monthly if you ride casually. After any long ride or wet weather, do a quick visual check. Don’t wait for problems to appear.
What’s the difference between checking hydraulic and mechanical brakes?
Mechanical brakes show wear earlier. You’ll notice reduced stopping power before they fail. Hydraulic brakes feel fine until suddenly they don’t. This makes hydraulic systems tricky. You must inspect them regularly instead of trusting how they feel.
How do I know if my brake pads are worn out?
Look through the caliper window at your pads. Most pads have a wear line marked on them. If the pad thickness matches that line, replace them soon. For hydraulic systems, check the pad thickness directly. Mechanical brake pads are easier to see from the side. Worn pads reduce stopping power and damage your rotor.
What does a functional brake test involve?
Pull the brake lever firmly while standing over the bike. Push the bike forward with your foot. The bike should resist movement strongly. If it rolls easily, your brakes need adjustment. Do this test for both front and rear brakes separately. A proper functional test takes just 30 seconds.
Why is rotor inspection important?
Your rotor can bend or develop cracks during rides. A damaged rotor reduces braking power and creates noise. Spin the wheel slowly and watch the rotor. It should not rub on the brake pads. If you see rubbing or bent areas, the rotor needs adjustment or replacement.

Philips is the founder and lead writer at GearheadGarageFinds.com, a passionate automobile enthusiast who has spent years testing, comparing, and reviewing auto products and accessories to help fellow gearheads make smarter buying decisions. When he’s not under the hood or behind the keyboard, you’ll find him exploring the latest automotive innovations and hunting for the best garage finds on the market.