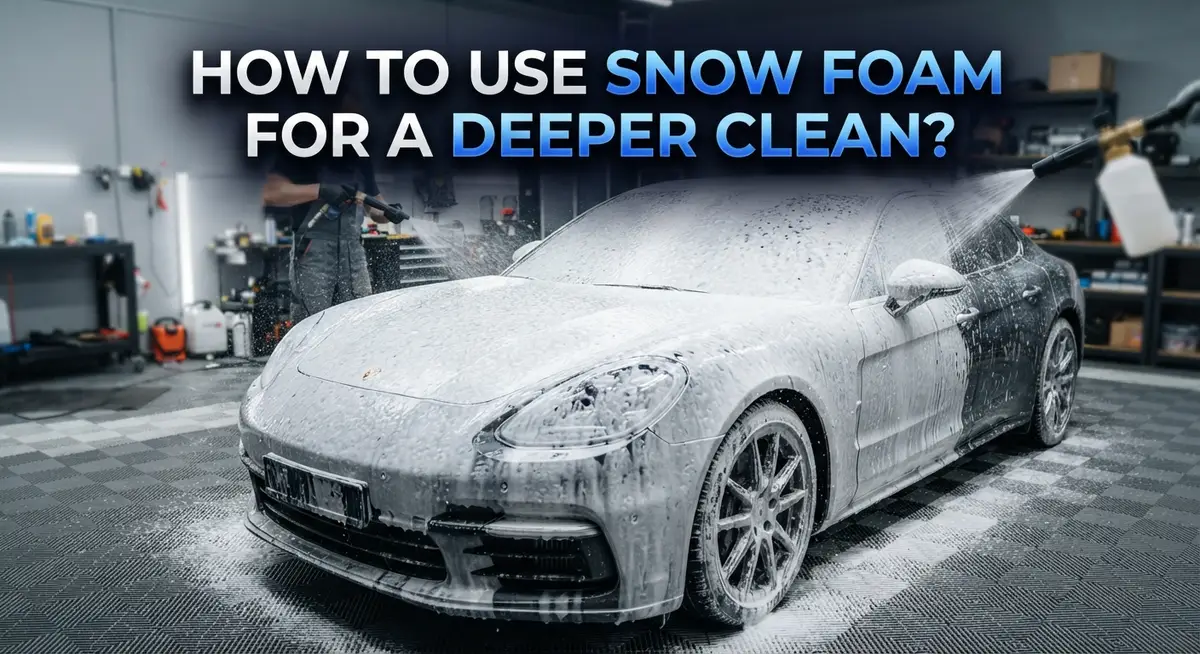
How to Use Snow Foam for a Deeper Clean?
Does your car deserve more than a quick rinse? If you want a deeper clean without damaging your paint, snow foam is your answer.
Snow foam is a pre-wash method that loosens dirt before you touch your car. It uses a foam cannon attached to a pressure washer to coat your vehicle in thick foam.
This foam breaks down grime, road grease, and stubborn contaminants chemically. That means less scrubbing and fewer scratches on your paint.
Many car owners skip this step and go straight to washing. But that often spreads dirt around instead of removing it.
In this guide, we will show you exactly how to use snow foam the right way. You will learn the correct dilution ratio, proper application technique, and how long to let the foam sit.
We will also cover common mistakes people make. Things like rinsing in the wrong direction or skipping the initial rinse.
By the end, you will know how to get a truly deep clean every time you wash your car. Let us get started.
In a Nutshell
Here’s a quick rundown of the snow foam process. Keep these points handy for your next wash day.
-
Rinse first. Always spray your car with plain water before foaming. This removes loose dirt and dust from the surface.
-
Get the dilution right. Mix your snow foam concentrate with water in the correct ratio. Too thick or too thin foam will not clean well.
-
Apply the foam evenly. Cover the entire car with a thick layer of foam using your cannon. Make sure every panel gets coated.
-
Let it dwell. Give the foam three to five minutes to break down dirt and grime. Do not let it dry on the paint.
-
Rinse top to bottom. This pushes dirt downward and away from clean areas. It also prevents streaking.
-
Double foam for tough grime. Heavily soiled cars often need a second foam layer. This step ensures a truly deep clean before contact washing begins.
Follow these steps in order, and you will avoid the most common mistakes people make with snow foam.
What Is Snow Foam and How Does It Work?
Snow foam is a cleaning product that comes as a concentrate. You mix it with water and apply it using a foam cannon attached to your pressure washer. The result is a thick, sudsy layer that covers your entire vehicle.
How it works is simple. The foam clings to your car’s surface and sits there while the cleaning agents do their job. These agents chemically break down dirt, road grime, bird droppings, tree sap, and other stubborn contaminants. This happens without you scrubbing or touching the paint.
The key difference from regular washing is timing. Snow foam gives chemicals time to dissolve grime before any contact with your paint. This means fewer scratches and swirl marks because you’re not grinding dirt into the surface with a wash mitt.
Think of it as a pre-wash softening step. Your car’s paint has layers of buildup that normal water alone cannot remove. Snow foam penetrates this layer and loosens everything stuck to it. Once the chemicals finish their work, a simple rinse washes away the loosened dirt.
The foam also suspends dirt particles so they float away rather than dragging across your paint. This separation is crucial for protecting your clear coat.
Most snow foam formulas are pH balanced, meaning they won’t strip wax or damage protective coatings. They’re designed to clean aggressively without being harsh on your car’s finish.
The result is a cleaner starting point for your actual hand washing. When you move to contact washing, your wash mitt encounters far less dirt. Your paint stays safer, and your wash water stays cleaner throughout the entire process.
Essential Equipment for Snow Foaming
Snow foam cleaning requires specific tools to work properly. You need a pressure washer as your main power source. This machine provides the water pressure necessary to apply and rinse the foam effectively.
A foam cannon is the essential attachment you add to your pressure washer. This device holds your diluted snow foam concentrate and mixes it with pressurized water as it sprays. The cannon creates those thick, clingy foam layers that stick to your car’s surface.
You’ll also need a clean water source. A garden hose connected to an outdoor tap works well for rinsing and filling your foam cannon. Make sure your water supply is reliable so you can complete the entire process without interruptions.
A measuring container helps you get the dilution ratio correct. Most snow foam concentrates require mixing with water at specific ratios. Accurate measurements ensure your foam has the right consistency and cleaning power. A simple bucket or jug with measurement markings does the job.
Protective gear matters too. Wear safety glasses to shield your eyes from foam splatter and pressure washer spray. Gloves protect your hands from the concentrated cleaning solution.
A soft-bristled brush can help for stubborn spots, though it’s optional. Some people prefer to skip the brush and rely entirely on the foam’s chemical action. A microfiber cloth or sponge for the contact wash comes after foaming is complete.
Finally, consider having a second bucket filled with plain water nearby. This lets you rinse your tools and hands without stopping the main cleaning process. Having everything organized before you start makes the entire snow foam experience smoother and more efficient.
Getting the Dilution Ratio Right
Getting the dilution ratio right is absolutely critical to your snow foam success. The concentrate you buy is not ready to use straight from the bottle. You must mix it with water first.
Most snow foam products come with instructions on the bottle. Read them carefully. The ratio typically ranges from 1 part concentrate to 5 parts water, though some formulas require different amounts. Always check your specific product’s label.
Use a measuring container to get this right. Guessing leads to problems. If you mix too little concentrate with too much water, your foam becomes weak. It won’t cling to your car or break down dirt effectively. You end up doing extra work for no real benefit.
If you add too much concentrate and not enough water, the foam becomes too thick and heavy. It may clog your foam cannon. It can also leave residue on your paint that requires extra rinsing. Neither situation is ideal.
The best approach is to measure both the concentrate and water before pouring them into your foam cannon. Use the same measuring cup for accuracy. Most people find a small kitchen measuring cup works perfectly for this task.
Write the ratio down on a sticky note and keep it near your washing supplies. This prevents you from second guessing yourself next time. Once you nail your dilution ratio, you’ll notice immediate differences in foam quality and cleaning power.
Test your ratio on a small section first if you’re unsure. You can always adjust before foaming your entire vehicle. Getting this foundation right makes every other step easier and more effective.
Step-by-Step: How to Apply Snow Foam
Start by rinsing your vehicle with plain water. This removes loose dirt and debris that could scratch your paint during foaming. Use moderate pressure and work from top to bottom so water carries particles downward.
Next, fill your foam cannon with the diluted snow foam solution. Make sure you’ve measured both the concentrate and water correctly using your measuring container. Attach the cannon firmly to your pressure washer to avoid leaks.
Apply the foam starting at the top of your vehicle and work your way down. Move in smooth, overlapping motions to ensure even coverage. The foam should cling to the surface in a thick, creamy layer. Some people prefer starting at the bottom and working up, but top to bottom is generally better because gravity helps the foam coat all surfaces.
Once you’ve covered the entire vehicle, let the foam sit for 3 to 5 minutes. This dwell time is crucial. The cleaning agents need time to break down dirt, tar, and other contaminants stuck to your paint. Don’t let it dry completely on hot days.
After the dwell time, rinse thoroughly with your pressure washer. Always rinse from top to bottom. This directs all the loosened dirt and foam downward and off the vehicle. Make sure no foam residue remains on the paint or wheels.
For heavily soiled vehicles, consider applying a second layer of foam. Let it dwell again for 3 to 5 minutes, then rinse completely.
You’re now ready to proceed with your regular contact wash using a wash mitt and bucket. Your paint is already cleaner and safer to scrub.
Dwell Time and the Double-Foam Technique
Dwell time is the period you allow foam to sit on your vehicle after application. This waiting period lets the chemical ingredients break down dirt, grime, and contaminants stuck to your paint. Most products work best with a dwell time between 3 to 5 minutes.
During this time, the foam’s active ingredients dissolve stubborn particles without you needing to scrub. This chemical action reduces the risk of scratches during your later hand wash. Shorter dwell times mean less chemical breakdown. Longer times can sometimes cause foam to dry on hot days, which reduces effectiveness.
The double foam technique takes your cleaning deeper. After your first foam application and 3 to 5 minute wait, rinse thoroughly from top to bottom. Then apply a second layer of foam and wait another 3 to 5 minutes. This second pass catches contaminants the first layer missed.
Heavy soiling, tree sap, and industrial fallout respond especially well to double foaming. The first layer handles surface dirt. The second layer tackles embedded particles. Two applications give your paint better protection than one alone.
Timing matters when using the double foam method. Don’t rush between applications. Let each layer work its full dwell time. Rinsing between layers removes loosened contaminants so the second foam can access fresh dirt underneath.
Weather affects your results. On hot days, foam dries faster and dwell time becomes shorter. On cool days, you have more flexibility. Overcast conditions are ideal for snow foaming since your paint stays cooler and foam stays active longer.
The double foam technique requires more product and time, but delivers noticeably cleaner results. Your contact wash afterward becomes easier since most contaminants are already chemically broken down.
Rinsing Correctly for a Spot-Free Finish
Rinsing correctly is what separates a spot-free finish from a streaky one. The direction you rinse matters more than you might think. Always rinse from top to bottom. This simple rule prevents dirty water from running upward and recontaminating already-cleaned areas.
Start at the roof or hood. Work your way down toward the wheels and lower panels. Gravity helps you here. Dirt and foam naturally flow downward, carrying contaminants away from your vehicle rather than spreading them around.
Use moderate pressure on your pressure washer. High pressure can strip wax or damage trim pieces. Medium pressure removes foam effectively without causing harm. Keep the nozzle moving in smooth, overlapping strokes. Don’t hold it in one spot too long.
Pay special attention to crevices and panel gaps. Water gets trapped in door seams, around mirrors, and near trim. These areas hold onto foam residue. Spend extra time flushing these spots thoroughly.
Water quality affects your final result. If your tap water is hard or mineral-rich, consider using filtered or distilled water for the final rinse. This prevents water spots from forming as droplets dry. Soft water rinses cleaner and dries faster.
After the pressure washer rinse, some people do a final hand rinse with a hose. This catches any remaining foam or debris. It’s optional but helpful for achieving that truly spot-free finish.
Timing matters too. Rinse while the foam is still wet and active. Don’t let it dry on the surface. Dried foam becomes harder to remove and can leave residue behind.
The goal is removing every trace of foam and loosened dirt. A thorough rinse ensures your contact wash starts with a genuinely clean surface, giving you the best possible results.
Common Snow Foaming Mistakes to Avoid
Many people make preventable mistakes when using snow foam. These errors reduce cleaning effectiveness and can damage your vehicle’s finish.
Skipping the initial water rinse is a common error. You need to remove loose debris first. Dirt particles sitting on dry paint can scratch during foam application. A quick rinse with plain water takes just minutes and protects your paint.
Getting the dilution ratio wrong ruins your results. Too much concentrate creates thick, heavy foam that doesn’t spread evenly. Too little concentrate means weak cleaning power. Always measure carefully and follow the product’s mixing instructions exactly. Write down your ratio and keep it visible during preparation.
Rinsing from bottom to top spreads dirt upward across your vehicle. This defeats the purpose of snow foaming. Always rinse from top to bottom so gravity carries debris downward and away from your paint.
Rushing the dwell time prevents the foam from working properly. The active ingredients need 3 to 5 minutes to break down contaminants chemically. Rinsing too early means you’re missing out on the cleaning power. Set a timer on your phone to stay on track.
Neglecting heavily soiled areas leaves your vehicle partially clean. Give extra attention to the lower sections where dirt accumulates most. These areas benefit from longer dwell times.
Using incorrect pressure washer settings can damage trim and seals. High pressure removes foam but may force water into gaps. Use moderate pressure and keep the nozzle moving to protect your vehicle.
Applying foam unevenly leaves streaks and missed spots. Work methodically in sections. Overlap your passes to ensure complete coverage from start to finish.
Snow Foam vs. Traditional Pre-Wash Methods
Snow foam and traditional pre-wash methods work differently. Understanding these differences helps you choose the right approach for your vehicle.
Traditional pre-wash methods rely on spray-on cleaners that you apply and rinse away. You spray the product directly onto the car, let it sit briefly, then rinse. These cleaners work through chemical action alone. They break down surface dirt and grime without any mechanical help.
Snow foam uses a foam cannon attached to your pressure washer. This creates a thick, clingy blanket of foam that clings to your vehicle’s surface. The foam stays in place longer, giving chemicals more time to work on stubborn contaminants.
The key difference is contact time and coverage. Snow foam blankets your entire vehicle uniformly. Traditional sprays often drip down before they finish working. Snow foam’s thickness means it doesn’t run off as quickly.
Snow foam also reduces scratch risk more effectively. Traditional methods sometimes encourage you to touch the surface while cleaning. Snow foam’s thick consistency makes contact unnecessary during the pre-wash stage. The foam does the heavy lifting chemically.
Cost and equipment matter too. Traditional pre-wash sprays need only a spray bottle. Snow foam requires a pressure washer and foam cannon attachment. However, snow foam typically covers larger surface areas more efficiently.
Dwell time differs between methods. Traditional sprays work in 1 to 2 minutes. Snow foam performs best with 3 to 5 minutes of dwell time. This longer contact period allows deeper chemical breakdown of contaminants.
Both methods work well when done correctly. Snow foam offers superior coverage and longer chemical action. Traditional pre-wash methods provide a simpler, equipment-light option. Your choice depends on your vehicle’s condition and available equipment.
Final Thoughts
Snow foam gives your car a deeper clean without harsh scrubbing. It breaks down dirt chemically before you touch the surface. This simple shift protects your paint over time.
The process is easy to learn. Rinse first, apply foam, wait a few minutes, then rinse again. Each step plays a role in the final result.
Dilution ratio matters more than most people think. Too much product wastes foam. Too little product weakens the clean. Getting this right takes practice, but it pays off.
Dwell time is another key factor. Give the foam enough time to work on grime. Rushing this step leaves contaminants stuck to your car.
Rinsing correctly seals the deal. Always work top to bottom. This directs dirt away from clean areas instead of spreading it around.
Weather and water quality also shape your results. Warm days speed up evaporation. Hard water can leave spots if you skip a final rinse.
For heavily soiled vehicles, double foaming helps. It adds extra contact time and lifts more dirt. This method takes longer, but the results speak for themselves.
Avoid common mistakes like skipping the water rinse or rinsing bottom to top. These small errors undo your hard work fast.
Snow foam is not complicated once you understand the basics. It simply asks for patience and the right technique.
With practice, you will notice a real difference in your car’s finish. Less swirl marks. Better shine. A cleaner result every time you wash.
Consistency is the real secret. Follow the steps each time you wash. Your car will thank you with a brighter, safer clean.
Frequently Asked Questions
How long should I let snow foam sit on my car?
Let the foam sit for 3 to 5 minutes on your vehicle’s surface. This dwell time allows the foam to chemically break down dirt, grime, and contaminants. The longer you wait, the more time the cleaning agents have to work. Don’t rush this step.
If your car is extremely dirty, you can extend the dwell time slightly. Just avoid letting the foam dry completely on hot days.
Can I use snow foam on a dirty car or should I rinse first?
Always rinse your car with water first. This removes loose debris and dirt particles that could scratch your paint during the foam application. A quick water rinse takes just a few minutes and makes a big difference.
Skipping this step means loose dirt stays on the surface. When you apply foam, you’re pushing debris around rather than lifting it away safely.
Is one application of snow foam enough or should I do two coats?
One application works fine for normally soiled vehicles. However, double foaming is recommended for heavily soiled cars. Apply foam, let it dwell for 3 to 5 minutes, rinse thoroughly, then repeat the process.
The second layer catches contaminants the first foam layer may have missed. This technique gives you the deepest clean possible.
Why is rinsing direction important when using snow foam?
Always rinse from top to bottom. This directs water and loosened dirt downward, away from your paint. Rinsing bottom to top spreads dirt upward across your vehicle, defeating the purpose of pre washing.
Gravity works with you when you rinse correctly. Make this your standard practice every time.

Philips is the founder and lead writer at GearheadGarageFinds.com, a passionate automobile enthusiast who has spent years testing, comparing, and reviewing auto products and accessories to help fellow gearheads make smarter buying decisions. When he’s not under the hood or behind the keyboard, you’ll find him exploring the latest automotive innovations and hunting for the best garage finds on the market.