
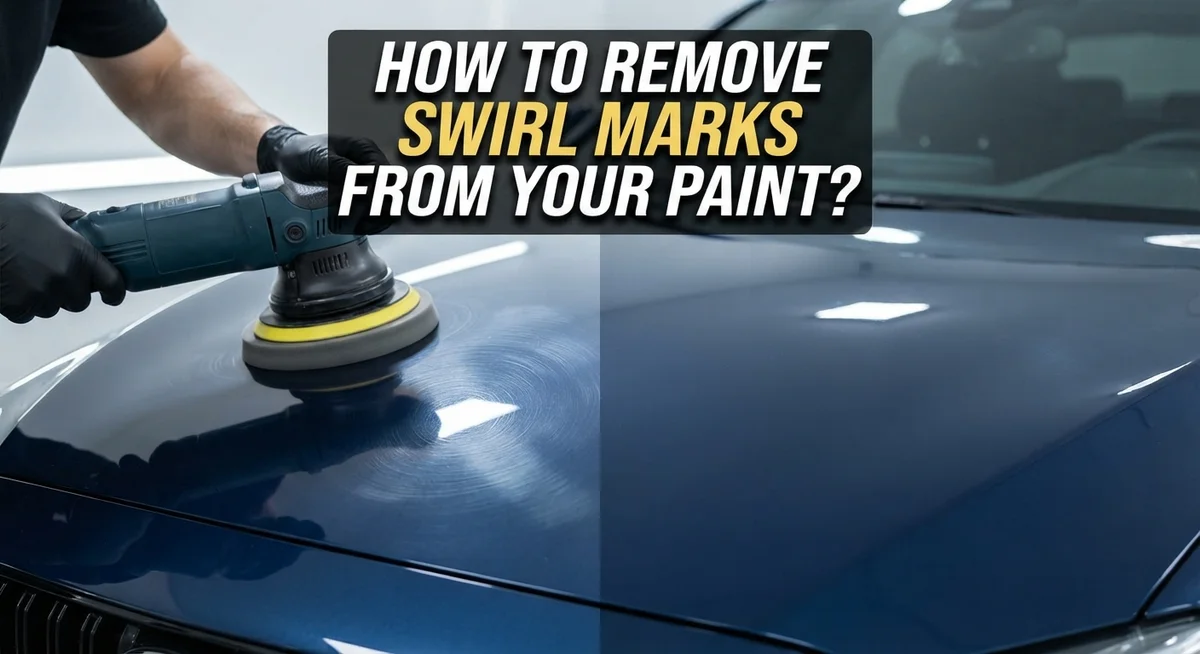
How to Remove Swirl Marks From Your Paint?
Every car owner knows that sinking feeling. You wash your car, step back to admire the shine, and then the sun hits the paint just right.
Suddenly you see them. Tiny spider web scratches covering your hood and doors.
These are swirl marks, and they can make even a brand new car look tired and neglected. The good news? You do not need to live with them.
Swirl marks happen from normal washing and drying. They sit on the surface of your clear coat, catching light in an ugly way.
The great news is that fixing them is totally doable at home. You just need the right approach and a little patience.
This guide walks you through the entire process. We will cover why swirl marks appear in the first place.
You will learn the exact steps to remove them safely, from clay bar treatment to compound application. We will also point out common mistakes that make swirls worse, not better.
By the end, you will know how to restore that deep, mirror like shine your paint deserves.
In a Nutshell
Here is a quick summary before you get started:
-
Clay bar first: Always clay your paint before polishing. This lifts embedded dirt and grime. It also gives you a smooth base to work with.
-
Grit progression matters: Start with a coarse compound and move to finer grits. Skipping steps leaves swirl marks behind. Patience here gives the best results.
-
Pad and technique count: Use a medium foam pad and work in slow, controlled motions. Rushing or using the wrong pad can create new marks. Slow and steady wins this job.
-
Prep the surface properly: A pre-wax cleaner helps compounds bond and work better. Skipping prep often leads to poor results. Clean paint is happy paint.
-
Compounds do the heavy lifting: Polish alone will not remove deep swirls. You need actual rubbing or polishing compounds. They physically level the clear coat.
-
Check your work often: Wipe down and inspect the paint under good light. This helps you catch missed spots early. It also tells you when to move to the next grit.
What Are Swirl Marks and What Causes Them?
Swirl marks are fine scratches that sit on your car’s clear coat. They catch light and create visible lines across your paint surface. Most car owners notice them when sunlight hits the paint at certain angles.
These marks form from everyday washing and drying habits. Using circular motions with a wash mitt creates friction that scratches the clear coat. Dirty wash water and microfiber towels can also leave marks if you rub too hard. Even automatic car washes contribute to swirl damage over time.
The clear coat serves as your paint’s protective layer. When swirls form, they sit on top of this layer. Removing them requires gentle surface abrasion to level the top portion of the clear coat. This is why polish alone won’t work for deeper swirls. You need rubbing compounds with actual cutting power.
The good news is that swirl marks are surface level damage. They don’t penetrate into your actual paint color. This means removal is possible without worrying about exposing bare metal underneath.
Swirls range from light to severe. Light swirls appear only under direct sunlight and reflect minimal light. Severe swirls stay visible in normal lighting and create obvious blemishes. The severity determines which grit compounds you’ll need to use.
Understanding what causes swirls helps you prevent them in the future. Gentle washing techniques and proper drying methods reduce new swirl formation. However, if your paint already has marks, don’t worry. The removal process is straightforward and achievable with the right approach and patience.
Assessing Your Paint’s Condition Before You Start
Before you start removing swirl marks, you need to know exactly what you’re working with. This step saves time and helps you choose the right tools.
Start with proper lighting. Find a space with bright, natural sunlight or use a work light. Swirl marks hide in shadows, so good lighting reveals their true depth and spread. Walk around your car slowly and look at different angles. This shows you whether you have light surface swirls or deeper damage.
Next, wash your car thoroughly. Dirt and grime mask the real condition of your paint. Use clean water and a soft cloth to remove all debris. Let the paint dry completely. You cannot assess damage on wet paint.
Run your hand gently across the affected areas. Your fingertips can feel texture changes that your eyes might miss. This tactile check helps you understand the severity. Swirls that you can feel are deeper than ones you only see under light.
Take photos in bright sunlight from multiple angles. These photos serve as your before and after reference. They also help you track progress as you work through the removal process.
Check the clear coat thickness. Look for areas where the paint appears thinner or dull. These spots need gentle handling. Aggressive polishing on thin clear coat can cause more damage.
Document which areas have the most swirls. Some sections of your car likely have worse damage than others. This information guides your work sequence. You can practice on less visible areas first before moving to high impact zones like the hood and doors.
Essential Preparation: Washing and Clay Bar Treatment
Washing your car properly is the first step toward removing swirl marks. You need a clean surface before applying any compounds or polishes. Dirt and debris stuck to your paint will only create more scratches during the correction process.
Start by rinsing your entire vehicle with cool water. Use a pressure washer on low setting if available, or a standard garden hose. This removes loose particles that could scratch during washing.
Fill two buckets with water. One bucket holds your wash solution, and the other is your rinse bucket. This two bucket method prevents dirty water from contaminating your washing mitt.
Use a soft microfiber wash mitt with your cleaning solution. Work from the top of your car down to the bottom. This follows gravity and prevents dirty water from dripping onto already clean areas.
Rinse each section thoroughly before moving to the next. Dry your car completely with a soft microfiber towel to prevent water spots.
Now comes the clay bar treatment, which is absolutely essential. A clay bar removes bonded contaminants that washing alone cannot eliminate. These include tree sap, industrial fallout, and brake dust embedded in your clear coat.
Spray a small section with clay lubricant. Gently rub the clay bar across the wet surface using light pressure. The clay will feel rough initially, then smooth as contaminants are removed.
Rinse the clay bar frequently under clean water. Work on one panel at a time. Once complete, rinse your entire car and dry it thoroughly.
Your paint is now clean and ready for compound application. This preparation step makes the actual swirl removal process much more effective.
Step-by-Step: Compounding and Polishing to Remove Swirls
Now that your paint is clean and prepped, you’re ready to tackle the swirl marks with compound and polish. This is where the real correction happens.
Start with your compound application. Choose a medium foam pad and attach it to your machine polisher. Apply the compound in small dots across a 2 by 2 foot section. Work the product in using slow, overlapping passes. Let the machine do the work rather than pressing down hard.
Keep your speed moderate and consistent. Move across the section in a pattern, then rotate 90 degrees and repeat. This cross pattern ensures even coverage. Work for about 30 to 60 seconds per section before checking your progress.
Wipe away the residue with a microfiber towel. Inspect the area under bright light. You should see swirl marks fading. Some deeper marks may need a second pass with compound.
After compound work, switch to a finer polish. This step refines the surface and prepares it for protection. Use a clean foam pad and apply polish the same way you did compound. Work more quickly here since polish is gentler than compound.
Check your results frequently. Stop and examine different angles under good lighting. Swirls should appear less visible or completely gone. If marks remain, you may need another compound pass before moving to polish.
The key is patience and proper grit progression. Rushing through stages or skipping the compound step won’t give you the results you want. Take your time, and your paint will reward you with a smooth, reflective finish that looks freshly detailed.
Choosing the Right Pads and Grit Progression
Selecting the right pads and understanding grit progression are critical for effective swirl mark removal. Your pad choice directly impacts how well the compound or polish works on your paint.
Foam pads come in different densities and colors. Medium foam pads work best for most swirl removal jobs because they provide enough cutting power without being too aggressive. Softer pads are gentler but remove swirls more slowly. Harder pads cut faster but risk damaging your clear coat if you’re not careful.
Grit progression means starting coarse and moving to finer grits. This approach prevents deeper scratches and creates a smoother final finish. Begin with a rubbing compound on a medium pad. This removes the swirl marks by leveling the top layer of clear coat. After you finish with compound, switch to a finer polish on a clean pad. The polish smooths out any micro scratches left by the compound.
Never skip steps in your grit progression. Jumping straight to polish without compound work means the swirls stay visible. Your results depend on working through each stage properly.
Pad condition matters too. Replace pads when they become matted down or clogged with dried product. A worn pad won’t apply pressure evenly across your paint. Always use a fresh pad when switching from compound to polish.
Keep your pad clean during work. Wipe it frequently on a microfiber towel to remove dried residue. This prevents buildup that interferes with product application and reduces effectiveness.
Match your pad type to your machine polisher. Some polishers work better with specific pad designs. Check your polisher’s compatibility before starting your project.
Safely Removing Residue and Finishing the Correction
After you finish compounding and polishing, you need to remove the residue left behind. This step is critical for seeing your actual results. The compound and polish leave a hazy film on your paint that can hide whether the swirl marks are truly gone.
Start by using a clean microfiber towel to wipe away all visible residue. Work in straight lines rather than circular motions. This prevents you from dragging leftover compound back into the paint. Fold your towel frequently to use fresh, clean sections.
For stubborn residue that won’t wipe away easily, use a pre-wax cleaner. Spray it onto a microfiber towel and gently wipe the affected area. This removes any remaining compound buildup without damaging your clear coat. Let the cleaner dry completely before inspecting your work.
Inspect your paint under bright light from multiple angles. This is where you discover if your correction worked. Look at the surface at different heights and distances. Swirl marks should appear significantly reduced or completely gone. If you still see marks, you may need additional compound passes or finer polishing stages.
Once you’re satisfied with the results, wash the entire vehicle one more time. Use your two bucket wash method to remove any remaining residue or cleaner. This ensures your paint is completely clean before you apply any protection like wax or sealant.
The finishing stage determines your success. Rushing through residue removal can make you think your work failed when it actually succeeded. Take your time, inspect thoroughly, and verify the swirls are gone before moving forward with paint protection.
Common Mistakes That Ruin Paint Correction Results
Many people rush through paint correction and make mistakes that actually make swirl marks worse. Understanding these errors helps you avoid them and get better results.
Skipping proper surface prep is the biggest mistake. You must use a clay bar first. Without this step, dirt and contaminants sit on your paint. When you apply compound or polish over dirty paint, these particles get dragged across the surface. This creates new scratches instead of removing old ones.
Using the wrong grit progression ruins correction work too. Some people jump straight to polish without using compound first. Swirl marks need coarser abrasion to level them out. Polish alone cannot do this job. You must start with a rubbing compound, then move to finer polishes. Skipping steps means the swirls stay visible under light.
Improper technique with your pad causes major problems. Pressing too hard burns through the clear coat. Moving too fast prevents the product from working. Using a dirty pad spreads old residue back onto clean areas. Your pad needs cleaning between sections.
Inadequate residue removal leaves a hazy finish. After compound work, you must wipe thoroughly. Stubborn residue requires a pre-wax cleaner. Skipping this step makes your paint look dull and unfinished.
Failing to inspect your work means you miss incomplete correction. Check your results under bright light from multiple angles. This shows you where you need more work. Many people finish without checking and later discover swirls still remain.
Avoiding these mistakes takes patience. Work slowly through each step. Your paint will thank you with a smooth, clear finish.
Preventing Future Swirl Marks Through Proper Wash Technique
Your washing technique directly affects whether swirl marks appear on your paint. The way you clean your car matters more than most people realize.
Start by rinsing your vehicle thoroughly with water before touching it with any cloth. This removes loose dirt and debris that can scratch your paint when you wipe. Never dry your car first and then wash it. That backwards approach traps particles against the surface.
Use the two bucket method when washing. Fill one bucket with soapy water and another with clean rinse water. Dip your wash mitt in the soapy bucket, work on one section, then rinse the mitt in the clean water bucket before reloading. This prevents dirty water from spreading swirls across your paint.
Wash from top to bottom. Gravity helps dirty water flow downward, so starting at the roof keeps contaminated water away from already cleaned areas. Work in straight lines rather than circular motions. Circular washing creates the swirl pattern you’re trying to avoid.
Use a soft microfiber wash mitt, not a regular sponge or cloth. Microfiber traps dirt particles instead of dragging them across your paint. Apply gentle pressure while washing. You don’t need to scrub hard. Let the soapy water do the cleaning work.
Dry your car with a clean microfiber drying towel immediately after rinsing. Pat the surface rather than rubbing it. Change to a fresh towel if it becomes saturated.
Proper washing prevents most swirl marks from forming in the first place. This technique takes only slightly longer than careless washing but protects your paint significantly. Prevention is always easier than correction.
Final Thoughts
Removing swirl marks takes patience and the right approach. You now know the full process from clay bar treatment to final inspection.
Paint correction is not a rushed job. Each step builds on the last one.
Skipping steps or rushing through grit progression leads to disappointing results. Take your time with each stage.
Remember that prevention beats correction every time. Good wash habits keep swirl marks from forming in the first place.
The two bucket method and proper drying techniques protect your paint daily. These small habits save you hours of correction work later.
If your paint already has swirl marks, don’t panic. You can fix them with clay bar treatment, compound, and polish.
Work through coarse to fine grit stages. This progression levels the clear coat properly and restores shine.
Always check your pad condition before and during work. A dirty or damaged pad can undo your progress fast.
After compounding and polishing, remove all residue carefully. Then inspect your paint under bright light to confirm the correction worked.
Practice makes this process easier over time. Your first attempt might take longer than expected, and that’s normal.
Focus on technique rather than speed. Rushing leads to mistakes that require redoing entire sections.
With the right tools and steady hands, most swirl marks disappear completely. Your paint can look glossy and smooth again.
Keep up good washing habits after correction. This protects your hard work and keeps swirls away longer.
Swirl mark removal is a skill you build over time. Each project teaches you something new about your paint and your technique.
Frequently Asked Questions
Can Polish Alone Remove Swirl Marks?
Polish alone usually won’t do the job. Swirl marks sit deeper in your clear coat than polish can reach. You need a rubbing compound first because it contains coarser abrasives. Polish works best as a final step after compounds have leveled the surface. Think of it like sanding wood: you start rough and finish smooth.
Why Is a Clay Bar Treatment Important?
A clay bar removes contamination before you start polishing. Your paint has invisible particles stuck to it from the road and air. These particles can scratch your paint further if you skip this step. The clay bar lifts these contaminants safely. This prep work makes your polishing results much better and cleaner.
Do I Really Need Multiple Grit Stages?
Yes, grit progression matters enormously. Starting with coarse grit removes the swirl marks but leaves fine scratches. Medium grit smooths those scratches. Fine grit creates the final smooth finish. Skipping stages leaves your paint looking uneven or hazy. Each stage prepares the surface for the next one.
How Do I Know When I’m Finished?
Check your work under good lighting. Swirl marks should be gone or barely visible. Run your hand across the area and it should feel smooth. After polishing, wipe away all residue with a clean cloth. Hazy spots mean you need to remove more compound. Proper inspection prevents disappointment later.
What Speed Should I Use on My Polisher?
Work slowly and deliberately. Fast speeds don’t improve results and can damage your paint. Medium speeds with steady pressure work best. Let the tool do the work instead of forcing it. Patience produces better paint correction than rushing.

Philips is the founder and lead writer at GearheadGarageFinds.com, a passionate automobile enthusiast who has spent years testing, comparing, and reviewing auto products and accessories to help fellow gearheads make smarter buying decisions. When he’s not under the hood or behind the keyboard, you’ll find him exploring the latest automotive innovations and hunting for the best garage finds on the market.


