How to Fix Loose E-Bike Pedals: A Step-by-Step Guide
Loose pedals can turn a smooth e-bike ride into a wobbly, noisy mess. You pedal down the road, and suddenly you feel a strange clicking or shifting under your feet. It’s annoying, and it can feel a little scary too.
Here’s the truth: this problem happens to almost every e-bike owner. Even brand new bikes, foldable models, and standard e-bikes can develop loose pedals after just a few rides. It’s not a sign that your bike is broken.
The good news? Fixing loose pedals is simple. You don’t need to be a mechanic or own a garage full of tools. With the right technique, you can tighten your pedals back up in about three minutes.
This article walks you through everything you need to know. We’ll cover why pedals loosen in the first place. You’ll learn the correct way to remove and reinstall them safely.
We’ll also point out common mistakes that damage your crank arms or pedals. By the end, you’ll know exactly how to keep your pedals secure for every ride.
In a Nutshell
-
Loose pedals are common, even on brand new e-bikes. Both foldable and standard models face this issue often.
-
The main fix is simple: tighten the pedal bolts using the right tools. This stops wobbles and noise fast.
-
Remember that left and right pedals thread differently. Mixing them up can damage your crank arms badly.
-
A proper fix takes about three minutes. You just need the correct wrench or Allen key for the job.
-
Always use the correct tools for this task. Wrong tools can strip bolts or scratch your bike frame.
-
Check your pedals often, even after a fix. Catching looseness early saves you from bigger repair bills later.
-
Never ignore a wobbly pedal. Small issues today can turn into expensive crank arm damage tomorrow.
-
Safe removal techniques protect your bike parts. Learning the right way helps your e-bike last longer.
Why E-Bike Pedals Loosen Over Time
E-bike pedals loosen because of constant motion and vibration. Every time you pedal, tiny movements occur between the pedal bolt and the crank arm. Over weeks or months, these small shifts add up and cause the connection to become slack.
The repetitive pushing force from your legs creates stress on the bolt. This stress works like a tiny hammer, gradually loosening the threads. Even gentle riding produces enough vibration to trigger this effect. New e-bikes are especially prone to this issue because the components haven’t settled yet.
Different pedal designs loosen at different rates. Platform pedals tend to loosen faster than clipless pedals because they handle more side-to-side movement. Foldable e-bikes experience even more loosening because they’re frequently folded and unfolded, which adds extra stress to the pedal connection.
Temperature changes also play a role. When your e-bike sits outside in hot sun, then cools down at night, the metal expands and contracts. This expansion and contraction gradually loosens the bolts over time.
Riding style matters too. Aggressive riders who push hard on the pedals create more vibration than casual riders. Bumpy terrain and rough surfaces increase loosening speed compared to smooth, paved roads.
The left pedal loosens faster than the right pedal in most cases. This happens because the left pedal has reverse threading. When you pedal forward, the pedal naturally wants to unscrew itself on the left side.
Ignoring loose pedals makes the problem worse. A slightly loose pedal can damage the crank arm threads if left unfixed. Eventually, the bolt falls out completely, and your pedal becomes unusable. That’s why regular checks prevent bigger problems down the road.
Tools You Need Before Getting Started
Before you start tightening your e-bike pedals, gather the right equipment. Having everything ready prevents frustration and keeps you from damaging your bike.
You’ll need a pedal wrench or Allen key. Most e-bikes use one of these two tools. A pedal wrench is a long, thin wrench designed specifically for this job. An Allen key (also called a hex key) works if your pedal has a hexagonal socket. Check your e-bike manual to see which tool fits your model.
A regular adjustable wrench can work in a pinch, but it’s less reliable. It may slip and strip the bolt head. Avoid this mistake by using the correct tool from the start.
Get a clean rag or cloth ready. Wipe away dirt and grime around the pedal area. This helps you see what you’re doing and prevents debris from entering the crank arm.
Consider having penetrating oil on hand if your pedals are stuck tight. Apply it around the bolt, wait a few minutes, and try again. This makes removal easier and reduces the chance of breaking components.
A work stand or bike stand makes the job much simpler. It holds your e-bike steady so both your hands stay free. You can work safely without the bike rolling away.
Wear work gloves to protect your hands from sharp edges and dirt. They also give you better grip on the wrench.
Finally, keep a small notebook nearby to write down which direction each pedal threads. The left pedal threads backwards (counterclockwise to remove). The right pedal threads normally (clockwise to remove). Writing this down prevents confusion mid-repair.
Understanding Left and Right Pedal Threading
E-bike pedals have a special threading system that confuses many riders. The left and right pedals thread in opposite directions. This design prevents pedals from loosening during normal riding.
Your right pedal uses standard threading. You turn it clockwise to tighten and counterclockwise to loosen. This matches what most people expect from normal bolts and screws.
Your left pedal works the opposite way. It has reverse threading. You turn it counterclockwise to tighten and clockwise to loosen. This might feel backwards at first, but it makes sense once you understand the forces at work.
Why do manufacturers use this system? When you pedal, your legs push downward and forward. This motion creates natural forces that want to unscrew bolts. The reverse threading on the left pedal fights against these forces instead of helping them.
Without opposite threading, both pedals would loosen quickly. Your right pedal would unwind from the natural pedaling motion. The reverse threading on the left pedal counteracts this tendency.
Knowing this difference is critical before you start working. If you turn your left pedal the wrong direction, you might tighten it further into the crank arm or strip the threads completely.
Always check which pedal you’re working on first. Look at the pedal or mark it with tape if needed. Take a moment to remember: right pedal turns like a normal screw, left pedal turns the opposite way.
This simple knowledge prevents costly mistakes. Many riders damage their crank arms by turning pedals the wrong direction. A few seconds of thinking saves your bike from serious harm.
Step-by-Step: Removing Loose Pedals Safely
Start by positioning your e-bike on a stable surface. A bike stand works best, but you can also lean it against a wall if needed. Make sure the bike won’t tip over while you work.
Locate the loose pedal first. Spin the pedals by hand to identify which one feels wobbly or moves more than it should. Mark the loose pedal mentally so you don’t waste time working on the wrong one.
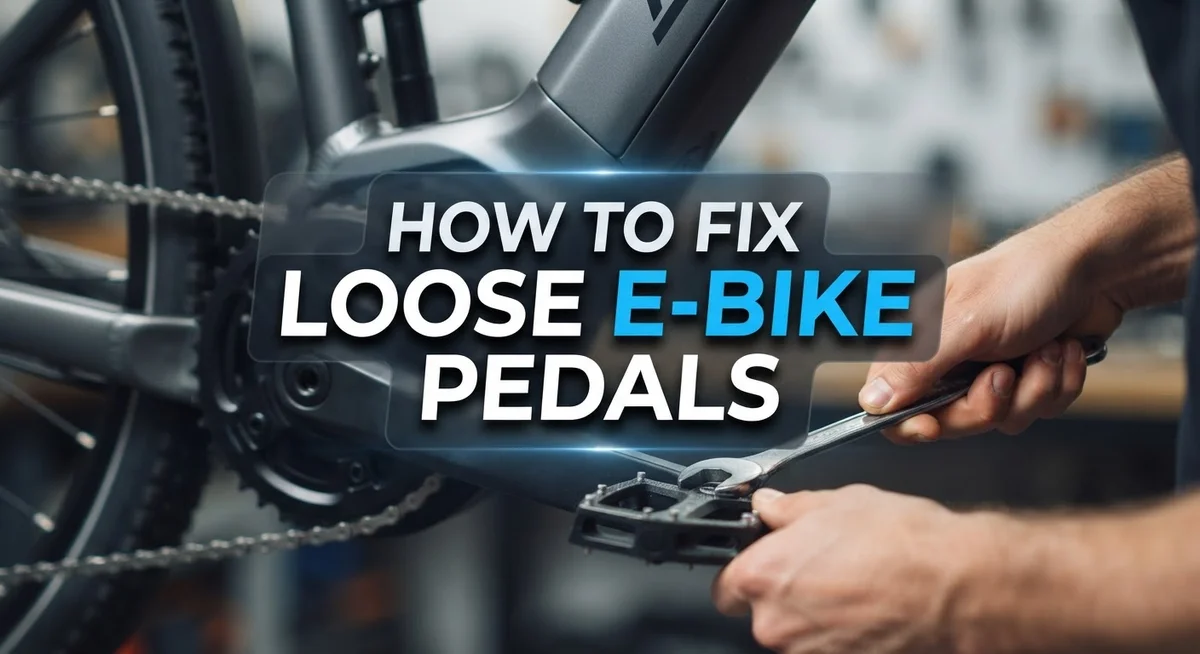
Grab your pedal wrench or Allen key. Position the tool firmly onto the pedal bolt. Apply steady pressure without forcing it. Rushing this step can strip the bolt or damage the crank arm.
For your right pedal, turn the wrench clockwise to tighten. This follows standard threading rules. Push slowly and feel for resistance as the bolt seats properly.
For your left pedal, turn the wrench counterclockwise instead. This opposite threading prevents loosening during normal pedaling. Many riders make mistakes here, so double check before turning.
Tighten gradually in small increments. You don’t need to crank hard. A firm snug fit is all you need. Over tightening can crack the pedal or damage threads permanently.
Test the pedal by hand after tightening. It should feel solid with minimal wiggle room. Spin it gently to ensure smooth rotation without grinding sounds.
Repeat this process for the other pedal if it also feels loose. Take your time with each step to avoid accidents. Once both pedals feel secure, your e-bike is ready to ride safely again.
Step-by-Step: Reinstalling and Tightening Pedals Correctly
Start by placing your e-bike on a flat, stable surface. A bike stand works best, but you can also lean it against a wall. Make sure the bike won’t tip over while you work.
Locate your pedal wrench or Allen key. These tools fit the pedal bolt properly without slipping. Hold the tool firmly in your hand before applying pressure.
Remember the threading difference. Your right pedal tightens clockwise. Your left pedal tightens counterclockwise. Check which pedal feels loose first so you don’t turn it the wrong way.
Insert your tool into the pedal bolt. Apply steady, gentle pressure. Tighten in small quarter turn increments rather than forcing it all at once. This prevents damage to the threads and crank arm.
After each quarter turn, stop and test the pedal by hand. Grab it near the end and try to wiggle it. When it stops moving, you’ve reached the right tightness. The pedal should feel solid but not overly tight.
Move to the other pedal if it’s also loose. Use the same technique with the correct direction for that side.
Once both pedals feel secure, spin them forward slowly. They should rotate smoothly without any grinding or clicking sounds. Listen for unusual noises that might indicate over tightening.
Wipe away any dirt or debris around the pedal area with a clean cloth. This helps you spot future looseness early. Check your pedal tightness every month during regular e-bike maintenance.
Test ride your e-bike on flat ground first. Pay attention to how the pedals feel during normal riding. They should stay completely still without any play or movement.
Common Mistakes That Damage Pedals or Crank Arms
Many riders damage their pedals or crank arms by using the wrong technique. Understanding these mistakes helps you avoid expensive repairs.
The most common error is using an incorrect tool size. When your wrench or Allen key doesn’t fit properly, it rounds off the bolt head. This makes future tightening nearly impossible. Always verify your tool matches the bolt before applying force.
Another frequent mistake is turning the pedal in the wrong direction. Since left and right pedals have opposite threading, turning left counterclockwise is correct. Turning it clockwise forces the bolt tighter into the wrong threads and can strip them permanently. Take a moment to confirm which pedal you’re working on.
Applying too much force too quickly causes serious damage. Many riders crank down hard immediately, but this can crack the crank arm or break the pedal axle. Tighten gradually in small increments instead. Test the pedal by hand between each quarter turn.
Ignoring loose pedals for weeks allows them to rattle excessively. This vibration damages the threads inside the crank arm socket. What starts as a simple tightening job becomes a replacement situation.
Using damaged or bent tools also causes problems. A worn wrench slips off the bolt and scratches surrounding components. Inspect your tools before each use.
Finally, reinstalling pedals without cleaning the threads first traps dirt inside. This prevents proper seating and causes rapid loosening again. Wipe both the pedal bolt and crank arm threads with a clean cloth.
These mistakes are entirely preventable. Use the right tool, confirm the correct direction, apply steady pressure, and maintain your components regularly. Your e-bike pedals will stay secure and functional for years.
Troubleshooting Persistent Pedal Looseness
When your e-bike pedals stay loose even after you tighten them, something deeper is happening. This problem requires a different approach than a simple tightening.
Stripped threads represent the most common cause of persistent looseness. The metal threads inside the crank arm wear away from repeated tightening and loosening. Once stripped, the bolt spins freely without gripping. You’ll notice the pedal tightens initially, then gradually loosens again within days or hours.
Check if the bolt itself is damaged. A bent or worn bolt won’t hold tension properly. Inspect the bolt threads closely for visible damage or flattening. Replace the bolt if you see these signs.
Crank arm damage also causes this issue. The threaded hole in your crank arm may have enlarged or cracked. Gently wiggle the pedal side to side while it’s installed. Excessive movement indicates crank arm problems rather than simple bolt looseness.
Dirt and debris trapped in the threads prevent proper seating. Remove the pedal completely and clean both the bolt and the threaded hole with a dry cloth. Wipe away any grease, sand, or rust buildup. Reinstall the pedal and tighten gradually.
Consider using a thread locking compound designed for bicycles. This adhesive prevents bolts from vibrating loose without permanently bonding them. Apply a small amount to the bolt threads before reinstalling.
If looseness returns immediately after tightening, the threads are likely stripped. You may need professional help to repair or replace the crank arm. A bike mechanic can assess whether the damage is fixable or requires replacement.
Regular checks prevent this problem from developing. Inspect your pedal tightness every few weeks during normal ownership.
Maintenance Tips to Prevent Future Loosening
Check your e-bike pedals regularly to catch looseness before it becomes a serious problem. Set a schedule for inspection. Many riders check their pedals every two weeks during regular riding seasons.
Start your inspection by hand. Grab each pedal and try to wiggle it side to side. If you feel any movement, tightening time has arrived. Listen for rattling sounds while riding. Strange noises often signal loose pedals before you feel movement.
Keep your pedal threads clean to prevent future issues. Dirt and debris act like tiny spacers inside the bolt hole. They prevent the pedal from sitting flush against the crank arm. Before reinstalling pedals, wipe the threads with a dry cloth. Remove any sand, mud, or old grease that accumulated.
Apply consistent pressure when tightening. Avoid sudden hard jerks on your wrench. Gradual, steady turns protect your threads from damage. Stop every few turns to test the tightness by hand.
Store your e-bike properly between rides. Vibration from rough terrain loosens pedals faster than smooth riding does. If you frequently ride on bumpy paths, check your pedals more often.
Consider the riding conditions you face. Off road use causes more loosening than street riding. Adjust your inspection schedule based on how you ride.
Replace damaged pedal bolts immediately. A worn bolt cannot hold tight properly. Stripped threads require professional help or complete pedal replacement. Catching problems early saves money and prevents crashes caused by pedal failure during rides.
Final Thoughts
Loose e-bike pedals are a common issue. But they are also easy to fix.
You just need the right tools and a little patience. Most riders can solve this problem in under five minutes.
Remember that pedals have different threading on each side. The right pedal tightens clockwise. The left pedal tightens counterclockwise. This small detail makes a big difference.
Always check pedal tightness before you ride. A quick hand check takes only a few seconds. This simple habit saves you from bigger headaches later.
Early detection is your best friend here. Catching a loose pedal early means a simple fix. Ignoring it means possible damage to your crank arms or threads.
New e-bikes often develop loose pedals within the first few rides. This happens as parts settle into place. Do not worry if this happens to you. It is completely normal.
Keep your tools clean and in good condition. Damaged tools cause more harm than good. A proper fitting wrench or allen key protects your pedals and crank arms.
If you notice persistent looseness, check for stripped threads first. This is often the real culprit behind recurring problems.
Clean threads and proper lubrication go a long way. They help pedals seat correctly and stay tight longer.
Taking care of your e-bike pedals protects your whole riding experience. A few minutes of maintenance now prevents costly repairs later.
Stay consistent with your checks. Your pedals, your crank arms, and your rides will thank you. Simple care today means smoother rides tomorrow.
Frequently Asked Questions
Why do e-bike pedals loosen so quickly?
E-bike pedals loosen because of vibration and movement during rides. Every time you pedal, small vibrations work the bolts outward. This happens on new e-bikes too. The problem gets worse if you ignore early looseness.
Can I tighten my pedals without special tools?
You need the right tool to do this safely. An adjustable wrench works, but a pedal wrench is better. Using the wrong tool can strip the bolt or damage your crank arm. Proper tools protect your bike from unnecessary damage.
Do both pedals tighten the same way?
No. The left and right pedals have different threading directions. Your right pedal tightens clockwise. Your left pedal tightens counterclockwise. This design prevents pedals from loosening during normal riding. Always confirm which pedal you’re working on before you start.
How often should I check my pedal tightness?
Check your pedals before every ride, especially during the first few weeks of ownership. A quick hand test takes seconds. Once you’re confident they stay tight, check them weekly. If looseness returns immediately after tightening, stop and inspect the threads for damage.
What should I do if my pedal keeps coming loose?
Stripped threads cause this problem. Inspect both the bolt and the crank arm for damage. Dirt trapped in the threads also prevents proper seating. Clean the threads thoroughly before reinstalling. A thread locking compound designed for bicycles can help, but only after you’ve confirmed the threads aren’t damaged.

Philips is the founder and lead writer at GearheadGarageFinds.com, a passionate automobile enthusiast who has spent years testing, comparing, and reviewing auto products and accessories to help fellow gearheads make smarter buying decisions. When he’s not under the hood or behind the keyboard, you’ll find him exploring the latest automotive innovations and hunting for the best garage finds on the market.