How to Jump-Start Your Car Safely With a Portable Kit?
Picture this. You turn the key, and your car stays silent. Your battery is dead, and you feel stuck.
This happens to almost everyone at some point. The good news is you can fix it fast with the right tool.
A portable jump starter is a small device that gives your battery the power it needs. It works without needing another car nearby. This makes it safer and more convenient than old fashioned jumper cables.
Many drivers now keep one in their trunk for emergencies. It saves time and stress when you least expect trouble.
In this guide, we will walk you through the entire process of jump starting your car safely. You will learn how to connect the clamps in the correct order. We will also cover the exact steps to power up your engine without damage.
Plus, we will point out common mistakes people make. Avoiding these errors keeps you and your vehicle safe.
By the end, you will feel confident handling a dead battery. Let’s get your car back on the road quickly and safely.
In a Nutshell
Here’s a quick rundown of the whole process. Keep this list handy for your next roadside moment.
- Connect red first. Always attach the red clamp to the positive terminal before touching the black one.
- Black clamp goes second. Clip it to the negative terminal only after the red one is secure.
- Turn on the jump starter. Switch on the device before you try to crank the engine. This step gets skipped often, so don’t forget it.
- Start the engine. Turn your key or press the button and let the car crank.
- Remove clamps in reverse order. Take off the black clamp first, then the red one, once your car is running.
- Double check terminals. Wrong terminal placement can damage your battery or the jump starter itself.
Safety always comes first during this process. A portable kit makes things simple, but skipping steps can cause real problems. Follow this order every single time, and you’ll avoid the most common mistakes drivers make.
What Is a Portable Jump Starter and How Does It Work
A portable jump starter is a compact battery device that stores electrical power. You can use it to start your car when the main battery dies. Unlike traditional jumper cables, you don’t need a second vehicle or another person to help you.
How it works is straightforward. The portable unit contains its own battery inside. When you connect the clamps to your car battery, electricity flows from the jump starter into your dead battery. This gives your battery enough power to turn the engine over and start it.
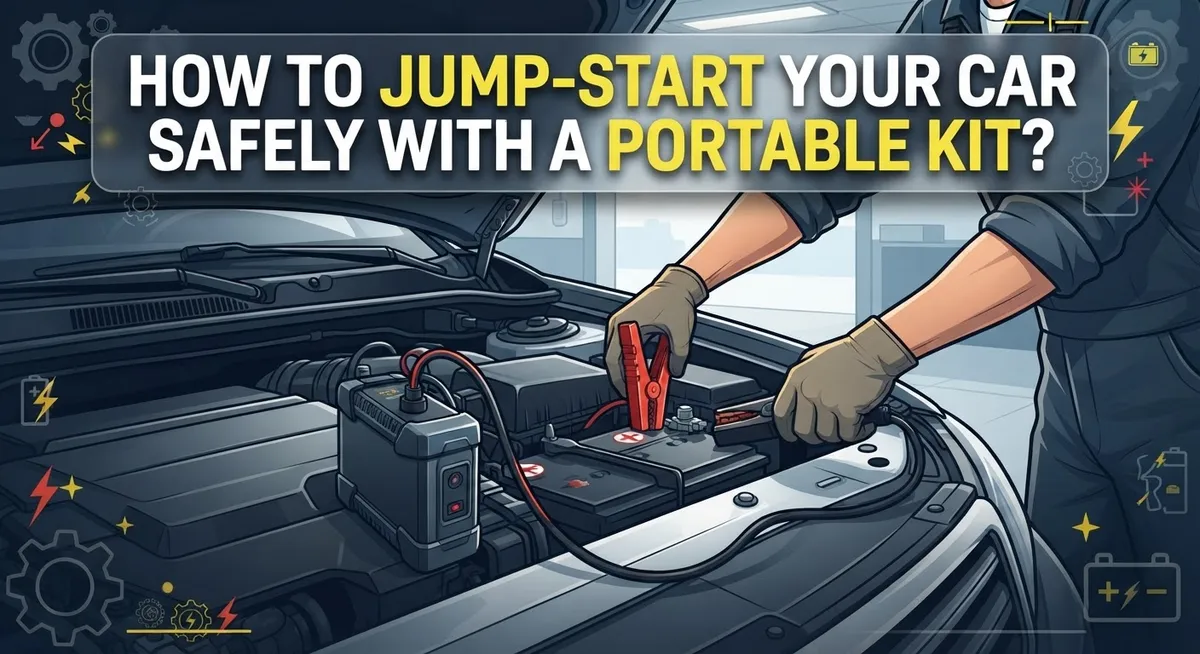
The device has two clamps: one red and one black. The red clamp connects to the positive terminal on your battery. The black clamp connects to the negative terminal. This setup completes an electrical circuit that allows power transfer to happen.
Most portable jump starters have a power button or switch. You flip this on after making both connections but before you try to start the engine. This activates the device and prepares it to deliver power. Some models turn on automatically when you make the connections.
The beauty of a portable jump starter is that it works independently. You can keep it charged in your trunk or at home. When your battery dies, you grab the device, make the connections, and start your car. No waiting for roadside assistance or calling a friend.
Safety is built into these devices. Modern jump starters have protection against reversed connections and short circuits. If you accidentally connect the clamps wrong, the unit usually won’t deliver power. This prevents damage to your car’s electrical system.
The process takes just a few minutes from start to finish. After your car starts, you disconnect the clamps and store the jump starter away. Your car’s alternator then charges your battery as you drive. This makes portable jump starters one of the most practical tools any driver can own.
Safety Checks to Perform Before You Begin
Before you grab your portable jump starter kit, take a few moments to check your car and the device itself. This prevents accidents and ensures everything works properly.
Start by inspecting your battery. Open your hood and look at the battery terminals. The positive terminal has a plus sign (+) and usually a red cover. The negative terminal has a minus sign (−) and is typically black. Make sure both terminals are clean and free from heavy corrosion. If you see white, blue, or green crusty buildup, gently brush it away with a dry cloth or old toothbrush. Corroded terminals can prevent a good electrical connection.
Check your portable jump starter next. Look at both clamps carefully. The red clamp should be clean and undamaged. The black clamp should also be in good condition. Press the power button to confirm the device has a charge. Most units have a light or display showing battery level. If the charge is low, plug it in to recharge before you need it in an emergency.
Look around your engine bay for hazards. Move any loose items away from the battery area. Keep flammable materials at a safe distance. Make sure the engine is cool or at least warm, not hot. A hot engine increases the risk of burns or injuries.
Inspect your car’s condition too. Turn off the engine completely. Disable all electrical components like the radio, headlights, and air conditioning. This reduces the electrical load on your battery and helps the jump start work better.
Finally, read your portable kit’s manual. Different devices have different features. Some have safety switches or special buttons. Knowing these details before you start prevents confusion when you’re stressed about a dead battery. Taking these few minutes now keeps you safe and sets up success.
Step-by-Step: Connecting Your Portable Kit Correctly
Connecting your portable kit correctly is the foundation of a successful jump start. The sequence matters more than you might think. Red clamp connects first to the positive terminal. This terminal has a plus sign on it. Look for it on your battery before you touch anything.
Once the red clamp is secure, move to the black clamp next. This one goes on the negative terminal, which has a minus sign. Never reverse this order. Connecting black first can damage your jump starter or battery.
After both clamps are attached firmly, turn on your portable jump starter. Most devices have a power button or switch on the front. Press it and listen for a beep or look for a light indicator. This tells you the device is ready to send power.
Now you can start your engine. Turn the key or press your ignition button as normal. The car should crank within a few seconds. If it doesn’t start after 3 to 5 seconds, wait 30 seconds and try again.
Once your car is running, disconnect the clamps in reverse order. Black clamp comes off first, then red. This prevents electrical surges and protects both your vehicle and the jump starter.
Keep the engine running for at least 20 minutes after a successful start. This gives your alternator time to recharge the battery. If your car dies again shortly after, the battery may need replacement.
Store your portable jump starter in a cool, dry place inside your vehicle. Check it monthly to make sure the battery stays charged. A dead jump starter won’t help you when you need it most. Following these connection steps ensures safe, effective results every time.
Starting the Engine and Disconnecting Safely
After your engine starts successfully, you need to disconnect the clamps in the correct order. This step matters just as much as connecting them properly. Disconnect the black clamp first. Remove it from the negative terminal of your battery.
Next, remove the red clamp from the positive terminal. This reverse order prevents electrical surges that could damage your car’s electrical system. Take your time and ensure both clamps are completely free before moving forward.
Once both clamps are off, turn off your portable jump starter. Some devices have a power button you press. Others switch off automatically. Check your manual to know which type you have.
Keep your engine running for at least 20 minutes after the jump start. This allows your alternator to recharge your battery. Turning off the engine too soon might leave your battery too weak to start again later.
Drive your car normally during this time. You can run errands or drive around your neighborhood. The movement helps your battery charge faster than sitting idle.
After 20 minutes, your battery should have enough charge to keep your engine running. If your car dies again shortly after, your battery may have a deeper problem. You might need a professional inspection or a battery replacement.
Store your portable jump starter in a safe location inside your vehicle. Keep it in your trunk or under a seat where it stays protected. Make sure it stays in a cool, dry place away from extreme temperatures.
Check your portable kit’s charge level regularly. Some devices have LED indicators showing battery status. A charged kit ensures you’re always ready for emergencies.
If your car continues having starting problems, don’t ignore the issue. Your battery or alternator might need attention. Visit a mechanic to diagnose the root cause and prevent future problems.
Common Mistakes That Can Damage Your Vehicle or Kit
Mistakes happen quickly when you’re dealing with a dead battery. The most dangerous error is reversing your cable connection order. Many people connect the black clamp first, then the red clamp. This causes sparks, battery damage, and potential injury. Always connect red to positive first, then black to negative. The order matters because it prevents electrical surges.
Connecting clamps to the wrong terminals creates serious problems. The positive terminal has a plus sign and usually a red cover. The negative terminal shows a minus sign and typically has a black cover. Mixing these up can damage your car’s electrical system permanently. Take a moment to identify each terminal before you touch anything.
Forgetting to turn on your portable jump starter before cranking the engine is another common mistake. Your device needs to be powered on to deliver current to your battery. If you skip this step, your engine won’t start and you’ll waste time troubleshooting. Check that your kit shows an active status before attempting to start your car.
Leaving clamps connected too long causes overcharging. Some people connect their kit and then wait around chatting or checking their phone. Extended connection times can damage your battery’s internal cells. Disconnect the clamps within a few minutes after your engine starts successfully.
Using a portable kit with low battery charge creates frustration. Many people store their devices and forget to check the charge level. A depleted jump starter won’t have enough power to start your engine. Check your kit’s battery status regularly, especially before winter months.
Finally, failing to inspect your kit before use leads to disappointment. Cracked clamps, corroded connections, and damaged cables reduce effectiveness. A quick visual check takes only 30 seconds and prevents failed jump start attempts. Store your device properly and inspect it monthly to catch problems early.
Troubleshooting When the Jump-Start Doesn’t Work
Sometimes your portable jump starter doesn’t work the first time. This happens to many drivers. The good news is that most issues have simple solutions.
First, check if your portable kit has enough charge. A low battery in your jump starter won’t deliver enough power to start your car. Look at the indicator lights or display screen. If the charge is very low, you need to recharge the kit before trying again.
Next, inspect both battery terminals on your car. Look for corrosion, which appears as white, blue, or green crusty buildup. This buildup blocks the electrical connection. You can clean the terminals with a wire brush or cloth. Remove any dirt or debris carefully.
Make sure you connected the clamps firmly to the terminals. A loose connection prevents power from flowing properly. The clamps should grip tightly without wiggling. Reconnect them if they feel loose at all.
Check that your portable starter is actually turned on. Many drivers forget this step. The power button should be activated before you attempt to crank the engine. Look for lights or sounds indicating the device is running.
Wait a few minutes between attempts. Your car’s battery needs time to accept a charge. Trying repeatedly without pausing drains your portable kit faster. Give it 5 to 10 minutes before trying again.
If the portable kit still doesn’t work, your car battery may have a deeper problem. The battery could be completely dead or damaged. You might need professional help at this point.
Consider calling a mechanic or roadside assistance service. They have specialized equipment to diagnose battery issues. Don’t keep attempting jump starts if nothing works after two or three tries. Repeated attempts can damage your vehicle’s electrical system or the portable kit itself.
Maintaining Your Portable Jump Starter for Reliable Use
A portable jump starter needs regular attention to work when you need it most. Check the charge level every month to ensure your kit has enough power stored. Most portable units have a display showing battery percentage, so you know exactly where you stand.
Store your portable jump starter in a cool, dry place inside your vehicle. Heat and moisture damage the internal battery and electronics over time. Keep it away from direct sunlight and extreme temperatures. A glove compartment or center console works well for most kits.
Clean the clamps regularly to prevent corrosion buildup. Dirt and oxidation on the metal surfaces reduce electrical contact with your car’s battery terminals. Use a dry cloth to wipe the clamps every few months. If you see white or green crusty buildup, gently scrub it away with a soft brush.
Test your portable jump starter twice per year to confirm it still works. Connect the clamps to a battery (with the engine off) and check if the unit powers on. This simple test catches problems before an emergency happens.
Replace your portable jump starter if it stops holding a charge. Most units last three to five years with proper care. If your kit won’t charge fully or loses power quickly, it’s time for a replacement.
Keep the instruction manual inside your vehicle or stored on your phone. You might need quick reference during a stressful situation. Knowing your specific kit’s features and buttons helps you act fast.
Inspect the cables and clamps for damage before each use. Look for cracks, burns, or loose connections. Damaged clamps can fail to grip battery terminals properly or create safety hazards.
Charge your portable jump starter after every use, even if you only used it for a few minutes. This keeps it ready for the next emergency. Some kits have automatic charging features that maintain battery health.
Final Thoughts
A dead battery does not have to ruin your day. With a portable jump starter, you can get back on the road in minutes.
Safety always comes first. Connect the red clamp to the positive terminal. Then connect the black clamp to the negative terminal. This order matters every single time.
Turn on your portable charger before you try to start the engine. This simple step trips up many drivers, but it makes all the difference.
Practice builds confidence. The more you use your portable kit, the more natural the process feels. Soon you will handle a dead battery without any stress.
Keep your kit charged and ready in your vehicle at all times. A jump starter with no power helps no one during an emergency.
Regular checks prevent surprises. Look at your clamps and cables often. Small problems caught early save you from bigger headaches later.
Remember that portable kits are safer than traditional jumper cables. You do not need a second car or a stranger’s help. You control the entire process yourself.
If your car keeps having trouble starting, treat that as a warning sign. A portable kit fixes the moment, but it does not fix a failing battery.
Think of your jump starter as part of your car’s safety gear. Just like a spare tire, it sits ready for the moment you need it most.
Preparation makes all the difference when your battery dies unexpectedly. A charged kit, a little know-how, and a calm approach will get you moving again.
Jump-starting your car does not need to feel stressful. With the right steps and a reliable portable kit, you can handle it safely and quickly, wherever you are.
Frequently Asked Questions
Can I use a portable jump starter on any car battery?
Yes, portable jump starters work on most standard car batteries. They fit vehicles with 12-volt systems, which includes nearly all cars, trucks, and SUVs on the road today. Before using one, check your vehicle’s manual to confirm your battery voltage. Some specialty vehicles or older models may have different systems, so it’s worth verifying first.
What’s the correct order for connecting the clamps?
The connection order matters for safety. Connect the red clamp to the positive (+) terminal first. Then connect the black clamp to the negative (−) terminal second. This sequence prevents electrical sparks and protects both you and your vehicle. Reversing this order can damage your car’s electrical system or cause injury.
Do I need to turn on the portable charger before starting my engine?
Yes, absolutely. Turn on your portable jump starter before you attempt to crank the engine. Many drivers skip this step and wonder why the jump-start fails. Check your kit’s instructions for the exact power-on button location. Once powered on, wait a few seconds before starting your car.
How long should I wait between jump-start attempts?
Wait at least 3 to 5 minutes between attempts. This gives your battery time to receive a charge from the portable kit. Trying to start your engine repeatedly without waiting drains both your car battery and your jump starter’s power. If it doesn’t work after two or three attempts, stop and call for professional help.
Is a portable kit really safer than jumper cables?
Portable kits offer more safety and convenience than traditional cables. You don’t need a second vehicle or another person present. The clamps are easier to handle, and the risk of incorrect connections decreases. Portable kits give you independence and control during an emergency battery situation.

Philips is the founder and lead writer at GearheadGarageFinds.com, a passionate automobile enthusiast who has spent years testing, comparing, and reviewing auto products and accessories to help fellow gearheads make smarter buying decisions. When he’s not under the hood or behind the keyboard, you’ll find him exploring the latest automotive innovations and hunting for the best garage finds on the market.