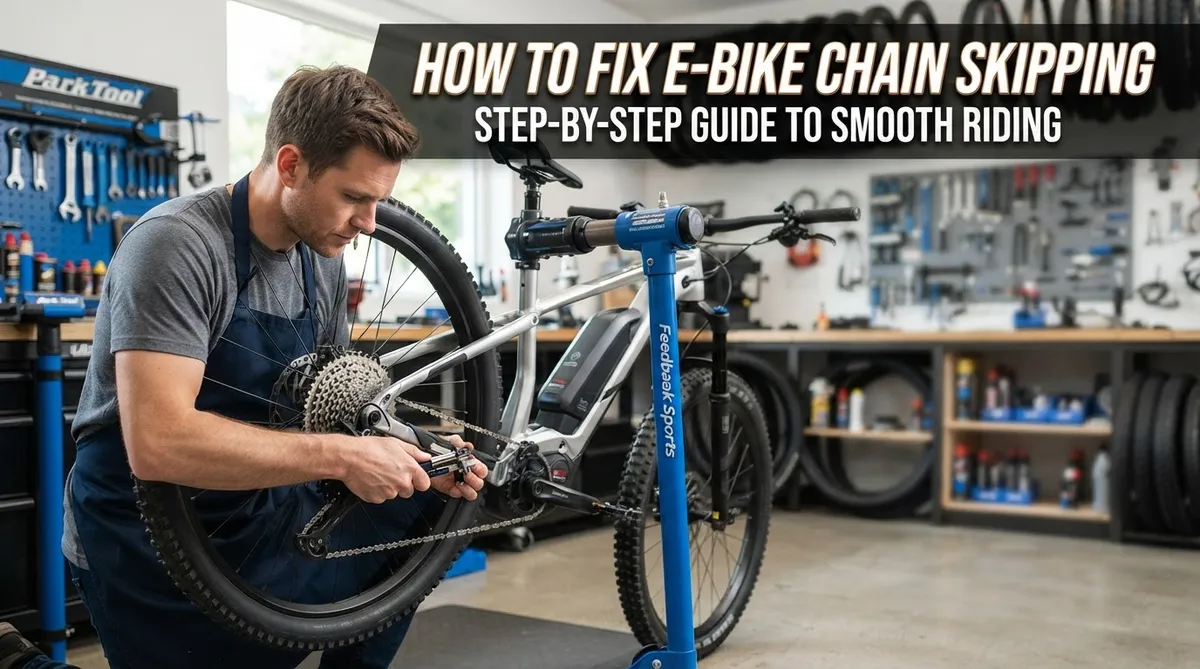
How to Fix E-Bike Chain Skipping: Causes, Step-by-Step Repairs & Prevention
Your electric bike hums along nicely. Then the pedals lurch, the chain jumps, and your heart skips a beat.
Chain skipping is annoying, and it can be unsafe. It also puts extra strain on a drivetrain that already handles a lot of power.
The good news is that you can fix most cases at home. The cause is usually simple. A worn chain, a bent derailleur hanger, loose tension, or dirt build up often sits behind the problem. Shifting under heavy pressure can also make the chain slip.
This guide shows you how to find the cause and fix it step by step. You will learn how to inspect the drivetrain, check the chain for wear, and straighten or replace a bent hanger.
We will also cover how to adjust tension with the barrel adjuster. You will see how to clean and lube the chain, and how to shift so the chain seats properly.
Grab a few basic tools, and let’s get your ride running smoothly again.
In a Nutshell
-
Find the cause first. Chain skipping often comes from build up, wear, misalignment, or loose tension. Inspect the drivetrain for a bent hanger or scratches on the derailleur.
-
Check the chain for wear. A worn chain keeps slipping. Replace it if needed, because cleaning and lubing alone help only for a short time.
-
Clean and lubricate often. Regular cleaning removes the build up that leads to slipping. A clean, lubed chain also runs more smoothly.
-
Fix the alignment. Straighten the hanger with an alignment tool, or replace it. Poor derailleur alignment causes inconsistent shifting and gear skipping.
-
Adjust the tension. Loosen both axle sides with a 15mm tool, then pull the wheel back to the right tension. Turn the barrel adjuster counterclockwise in small steps, about 1/4 turn each time.
-
Shift with care. Avoid shifting under heavy pressure, since it can cause skipping. Pedal by hand and shift to the correct gear to seat the chain. On bumpy rides, a clutch derailleur can keep the chain from getting knocked loose.
Why E-Bike Chains Skip: Common Causes Explained
Chain skipping usually has a clear reason behind it. Knowing the cause makes the fix much faster.
Worn parts are the most common culprit. Over time, chain links stretch and the teeth on the cogs wear down. Worn teeth cannot grip the chain well, so it jumps.
Bent hangers and misaligned derailleurs cause trouble too. A small bend in the derailleur hanger pulls the rear derailleur out of line. The chain then cannot sit cleanly on each gear.
Look for scratches on the derailleur as well. These marks often point to a past knock or fall.
Dirt and old grease build up over time. Grit mixes with grease into a sticky layer. This layer stops the chain from seating fully on the teeth.
Loose tension is another frequent cause. A chain that hangs too loose can jump under pedaling force. Bumpy trails make this problem worse.
Rough terrain can knock the chain free. Rocks, roots, and potholes jolt the drivetrain hard. A clutch derailleur adds friction and keeps the chain steady on bumpy rides.
Your riding habits play a role. Pedaling hard while you change gears can push the chain off track. Timing each shift with a light pedal stroke helps the chain land correctly.
Derailleur limit screws matter too. If the limit screws are set wrong, the derailleur may not reach the outer or inner gears. The chain then slips off the edge of the cassette.
Take a close look before you adjust anything. Good inspection saves time. Once you spot the cause, you can pick the right fix.
Inspecting the Drivetrain for a Bent Hanger and Derailleur Damage
Start with a close look at the rear hanger. The hanger is the small metal tab that holds the derailleur. It sits at the end of the rear dropout, where the wheel meets the frame.
Before you touch anything, switch off the electric bike and remove the battery. This keeps you safe while you work.
Stand directly behind the bike and look down the frame. The derailleur should hang straight down and line up with the wheel. If it tilts inward or outward, the hanger may be bent.
Shift into the smallest rear cog first. Then check the gap between the upper pulley and the cassette. A bent hanger often pushes the pulley too far from the cogs or pulls it too close.
Use a straight edge for a closer check. Hold a ruler flat against the side of the wheel and compare it to the derailleur cage. A gap that looks uneven from top to bottom points to a bent hanger.
Next, examine the derailleur itself. Look at the cage plates, pulleys, and mounting bolt. Bent plates, cracks, or deep scratches can throw off shifting and cause skipping.
Spin the rear wheel slowly by hand. Watch the derailleur for side wobble or rubbing against the spokes. Rubbing or wobble suggests the hanger or derailleur needs attention.
Check the frame near the dropout too. Fresh chips, paint cracks, or bulges often signal a stressed area. Cracks mean the part needs replacing, not just straightening.
If the hanger and derailleur look straight, the skipping may come from another source. Write down what you find. Your notes help you choose the right repair steps next.
Checking the Chain for Wear and Knowing When to Replace It
Checking chain wear is one of the fastest ways to solve skipping. Many riders skip this step, but a stretched chain often causes the problem. Take a few minutes to test it before ordering any parts.
Start by cleaning the chain so you get an accurate reading. Grime can hide the true wear on the rollers. Wipe the chain with a dry cloth, then give it a quick scrub if needed.
Next, measure the chain with a ruler. Pick a section and measure from the outside edge of one pin to the matching pin twelve links later. A new chain measures exactly 12 inches. Chains that have stretched about 0.5 to 0.75 percent should be replaced soon.
Look at the cassette teeth too. Worn cogs often have a hooked or shark fin shape. If the teeth look pointed, a new chain will likely skip on them. Replace the cassette and chain together.
Also check for stiff links. Press the chain gently to see if any links bind or refuse to bend. Stiff links, rust spots, and cracked side plates all mean the chain needs replacing right away.
Electric bikes wear chains faster than regular bikes. The motor adds extra torque, so the chain works harder with every pedal stroke. Riders who use high assist levels often need new chains sooner.
Know when to replace the chain. Replace it when it measures past the wear limit, when links bind, or when skipping continues after cleaning and tension fixes. A quick swap restores smooth shifting and protects the cassette from further damage. Act early.
Straightening or Replacing a Bent Derailleur Hanger
A bent derailleur hanger is one of the most fixable causes of chain skipping. Straightening it often works well when the bend is small. Fixing it early protects the rest of your drivetrain.
Start by unbolting the rear derailleur from the hanger. Then fit a hanger alignment tool onto the mounting point. Turn the tool slowly to push the hanger back into line.
Go slowly during this step. Too much force can snap the hanger. Check the alignment often with the wheel back in place.
Some hangers cannot be fixed. A hanger that cracks or bends sharply will often fail again. In that case, replacement is the safer choice.
Many frames use a specific hanger design. Check the frame maker’s details before you buy a replacement.
After straightening or replacing, you must adjust the tension. Loosen both axle sides with a 15mm tool. Pull the wheel back to correct the tension.
Use the barrel adjuster in small steps. Turn it counterclockwise about one quarter turn to increase tension. Shift through the gears after each change to test the result.
Pedal by hand while shifting into the correct gear. This helps the chain seat fully on the cogs. Listen for clean shifts and quiet running.
Avoid shifting under heavy pressure. Ease off the pedals for a moment when you change gears. This simple habit reduces stress on the hanger.
Test the ride before a long trip. Take a short loop around the block. Watch for skipping under load and on hills. If the problem returns, check the chain wear next. Small fixes can add up quickly too.
Adjusting Chain Tension and the Barrel Adjuster Step by Step
A loose chain can jump off the teeth under pedal force, while a chain that is too tight can strain the drivetrain. The goal is a balanced fit that holds the chain in place.
Gather your tools first. You will need a 15mm wrench and a small screwdriver. Keep the electric bike upright on a stand if you own one.
Step 1: Loosen the axle nuts. Use the 15mm wrench to loosen both sides of the rear axle. Loosen them just enough so the wheel slides in the dropouts.
Step 2: Pull the wheel back. Push the wheel rearward until the chain feels snug. Tighten both nuts evenly so the wheel stays centered in the frame.
Step 3: Find the cable adjuster. Look where the derailleur cable enters the housing. The adjuster is a small knurled cylinder near that point.
Step 4: Make a gentle turn. Twist the adjuster slightly and stop after each small movement. Then test the gear before you turn it again.
Step 5: Check the limit screws. Make sure the derailleur does not push the chain past the largest or smallest cog. The limit screws set the outer stops. Adjust them if the chain runs off either end.
Tip: If the adjuster runs out of room, turn it back to the middle. Then loosen the cable pinch bolt, pull the cable snug, and retighten it. This resets the cable tension.
Final check: Spin the pedals and shift through every gear. The chain should move smoothly without jumping. Take your time with each change, and you will quickly learn the feel of a well set drivetrain.
Cleaning, Lubricating, and Seating the Chain Correctly
Cleaning comes first in any drivetrain fix. Dirt, grit, and old grease build up on the links. This sticky layer makes the chain catch on the teeth. A clean chain seats far more easily.
Use a degreaser and a chain cleaning tool. Place the chain in the tool, then turn the crank slowly. Scrub each link until the black grime disappears. Wipe the chain with a clean rag afterward.
Let the chain dry completely before lubing. Water or leftover solvent can wash away fresh oil. A dry chain also lets the lube bond to the metal.
Apply lubricant to each roller with one small drop. Work slowly while you pedal backward. Wait a few minutes so the oil soaks in. Then wipe off the extra oil from the outside of the links.
Less lube works better. Too much oil attracts dirt. A thick coat turns into grit that wears the drivetrain faster. Use a light, even coat instead.
Pick lube that fits your riding conditions. Wet weather calls for a thicker wax lube. Dry, dusty trails often suit a lighter oil.
Seating the chain correctly takes a gentle touch. Ease off the pedals just before you shift. Then move the shifter with a light hand.
Keep the pedals moving slowly after the shift. Turn the crank forward for a few rotations. Watch the chain settle onto the teeth.
Listen for a smooth, quiet sound. A grinding or clicking noise means the chain is not seated yet. Try the shift again with light pressure.
Test every gear one by one. Shift up and down through the cassette slowly. Note which gear skips or hesitates, since that gear points to the problem. A clean, quiet shift means the chain sits well.
Common Mistakes That Make Chain Skipping Worse
Many riders make small errors that turn a minor skip into a costly problem. Avoiding these habits helps your bike shift smoothly again.
Shifting under heavy pressure is the most common mistake. When you push hard on the pedals, the chain struggles to move between gears. Ease off for a moment before you change gears.
Ignoring a worn chain makes the problem grow. A stretched chain does not grip the teeth well. Cleaning and oiling may help for a short time, but a worn chain will keep slipping.
Letting grit build up on the drivetrain also causes trouble. Dirt mixes with old oil and forms a sticky layer. That layer changes how the chain sits on the sprockets.
Skipping inspections after a crash can hide serious damage. A slightly bent hanger or a scratched derailleur may look minor. Check these parts after every fall or hard impact.
Riding over rough ground can knock the chain loose. Bumps and potholes push the chain off the teeth. Frequent trail riders may benefit from a clutch derailleur on bumpy routes.
Continuing to ride with skipping gears damages the cassette. Worn rear gear teeth make skipping worse over time. Fixing the issue early usually saves you from a larger repair later.
Changing several things at once hides the real cause. Adjust one part, then test the gears again. This approach shows you exactly what fixed the problem.
Avoiding these mistakes protects your drivetrain and extends the life of your parts. Patience and careful checks give you the best results.
Preventing Skipping on Bumpy Rides with Good Habits and a Clutch Derailleur
Bumpy rides test every drivetrain. Good habits help your chain stay seated when the ground gets rough. Small routines make a big difference over time.
Start with a quick look before each ride. Check that the chain sits neatly on the teeth and that the rear wheel is secure. Look for scratches on the derailleur, too.
Keep an eye on the chain’s condition. A chain that stretches can move more than it should on uneven trails. Check the wear regularly and replace the chain when needed.
Ride with smooth pedaling. Stay relaxed on the handlebars and let your arms and legs absorb the shocks. Hard jolts push the chain off the teeth more easily. Ease off the pedals for a moment when you hit a rough patch.
Shift early, not during a bump. Change gears before you reach a rocky section so the chain already sits well on the sprocket. Avoid shifting in the middle of a drop or a sharp jolt.
A clutch derailleur adds extra control. This type of rear derailleur uses a clutch mechanism to keep steady tension on the chain. The chain stays closer to the cassette, which helps on rough ground.
Clutch models add friction to the cage, so the chain resists bouncing. Many riders notice fewer drops on washboard roads and trail sections. A clutch does not fix a worn chain or a bent hanger, though.
Use the clutch switch if your derailleur has one. Turn it on before a bumpy ride and turn it off for smooth pavement if you prefer lighter shifting.
Finish with a quick ride test. Pedal gently through each gear after any change. Listen for quiet, steady shifts. Good habits and a clutch setup together keep the chain riding smoothly.
Final Thoughts
Chain skipping on an electric bike feels annoying, but you can fix it. Most cases trace back to build up, wear, misalignment, or loose tension.
Start with a careful inspection. Look at the chain for wear, and check the derailleur for scratches. Then check the hanger for bends.
A worn chain needs a replacement. Cleaning and lubing alone may help only for a short time if the chain has stretched too far.
If the hanger is bent, straighten it with an alignment tool or replace it. Poor derailleur alignment causes inconsistent shifting and gear skipping.
To fix loose chain tension, loosen both axle sides with a 15mm tool. Pull the wheel back until the tension feels right, then tighten both sides.
Next, turn the barrel adjuster counterclockwise in small steps, about a quarter turn at a time. Test the shifting after each step.
Shift to the correct gear while pedaling manually to seat the chain. This simple move confirms the chain sits well on the teeth.
Keep in mind that shifting under heavy pressure causes skipping. Light pedaling during a shift protects the chain and the gears.
Good habits keep the problem from returning. Clean your chain often, lube it lightly, and ease off the pedals before you shift.
A clutch derailleur can also help if bumpy trails keep knocking the chain loose.
Take your time and test each gear after every change. If the chain still skips, visit a trusted bike shop for a closer check. A small repair now saves your drivetrain later. Every ride will feel smoother.
Frequently Asked Questions
Why does my chain skip only in certain gears?
Skipping in one or two gears often means the cogs are worn. Look closely at the teeth on the cassette. Worn teeth look hooked or shaped like a shark fin. A new chain will not grip these teeth well.
How can I tell if my shifter cable is stretched?
A stretched cable makes shifts land late or overshoot the gear. Use the cable adjuster near the rear derailleur to fine-tune the shift. Make small changes and test each gear slowly after every turn.
What do derailleur limit screws do?
Limit screws stop the derailleur from moving too far in or out. If the chain drops off the smallest or largest cog, the screw may need a small adjustment. Turn the screw only a little at a time and recheck the shifting.
Can chain length cause skipping?
Yes. A chain that is too long can sag and bounce on the teeth. A chain that is too short can pull the derailleur tight and cause problems. Check the chain length whenever you install a new chain.
When should I take my electric bike to a shop?
Visit a shop if the skipping continues after basic checks. Mechanics can check the frame, wheel alignment, and motor sensor issues. Getting help early can prevent expensive damage to the cassette and derailleur.

Philips is the founder and lead writer at GearheadGarageFinds.com, a passionate automobile enthusiast who has spent years testing, comparing, and reviewing auto products and accessories to help fellow gearheads make smarter buying decisions. When he’s not under the hood or behind the keyboard, you’ll find him exploring the latest automotive innovations and hunting for the best garage finds on the market.